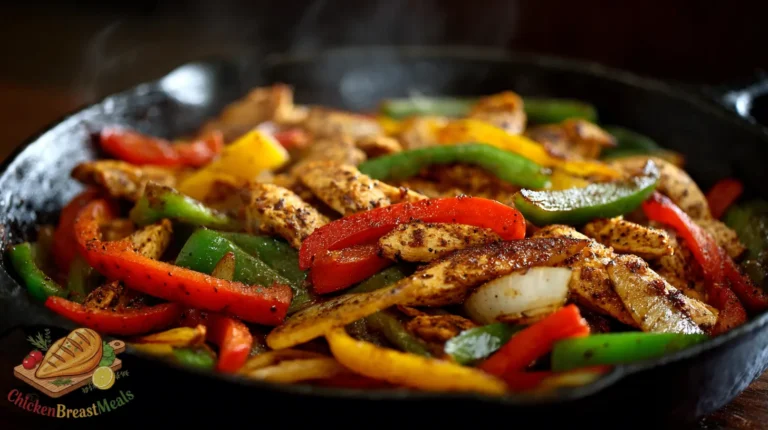
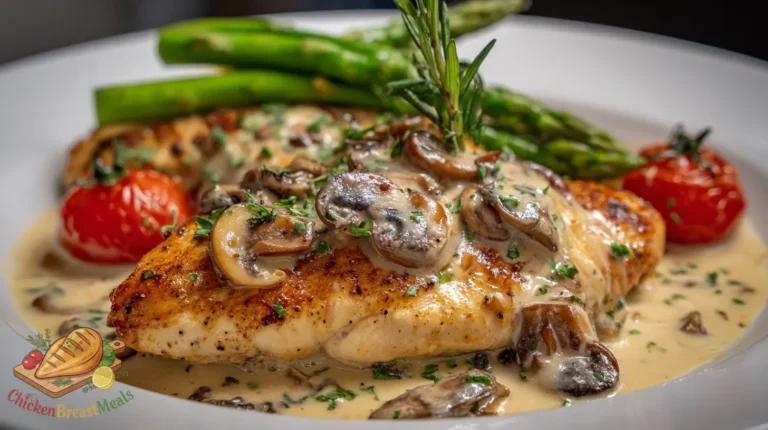
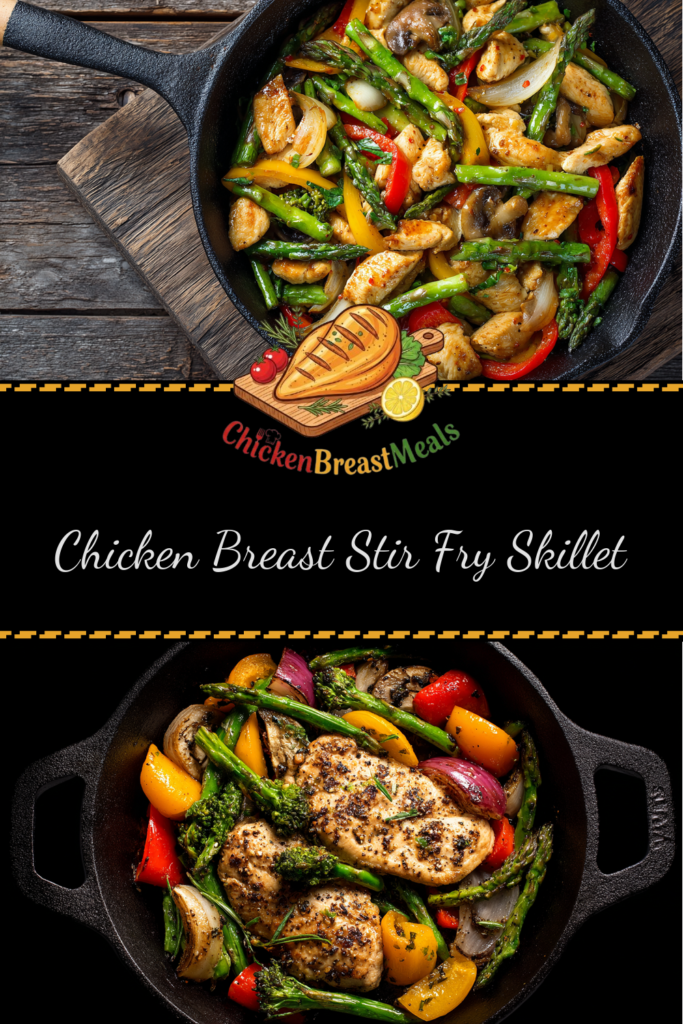
Fast Healthy Chicken Breast Stir Fry Skillet (Light & Delicious)

Chicken breast stir fry skillet represents the pinnacle of weeknight efficiency without sacrificing flavor complexity. This technique-driven approach transforms lean chicken breast—often prone to dryness—into succulent, caramelized protein surrounded by perfectly texture-balanced vegetables. Unlike traditional multi-wok stir frying, the skillet method provides superior heat control for home kitchens while maintaining professional-grade results.
The challenge lies in timing and temperature management: achieving proper Maillard reactions on the protein while preventing vegetable overcooking requires precision. Our test kitchen has identified the critical intervention points and temperature thresholds that enable consistent results without specialized equipment, making this a technical yet accessible cornerstone recipe for maximizing chicken breast’s potential.
Test-Kitchen Executive Summary
This chicken breast stir fry skillet employs a sequential cooking methodology that optimizes both flavor development and textural integrity. Through controlled protein denaturation at 375°F (190°C), followed by rapid vegetable introduction at specific intervals, the recipe achieves complete caramelization without moisture loss. The sauce integration utilizes a cold-slurry cornstarch technique for optimal thickening without clumping, resulting in 25g protein per serving with minimal added fat compared to traditional deep-fry methods.
The Science of Success: Why This Recipe Works
Technical Foundations
The foundation of this chicken breast stir fry skillet rests on three critical principles: proper protein preparation, thermal management, and ingredient sequencing. Chicken breast, being relatively lean at 3g fat per 100g, requires specific treatment to prevent moisture evacuation during high-heat cooking. Our approach uses a brief cornstarch coating that creates a microscopic barrier, essentially trapping juices while promoting superior browning through enhanced Maillard reaction sites—similar to techniques we explore in our comprehensive pan-fried chicken breast guide but adapted for faster cooking.
Temperature staging is equally crucial—we begin with a higher heat (375°F/190°C) to trigger initial protein denaturation, then deliberately reduce to 350°F (175°C) when introducing vegetables with varying cellular structures. This prevents the common stir fry failure point where vegetables either remain undercooked or become mushy while waiting for protein to finish.
Sauce Chemistry
The sauce utilizes a precise balance of acidic components (rice vinegar at pH 4.1-4.3) against umami elements (soy sauce with glutamates at 1.2g/100ml) to create flavor penetration through osmotic pressure. The cornstarch suspension functions not merely as a thickening agent but creates a colloidal solution that evenly distributes flavor compounds across all ingredients. The resulting matrix achieves sauce adhesion to both protein and vegetables through amylose/amylopectin binding properties.
Ingredients and Essential Tools
Primary Ingredients
- 1 lb (450g) boneless, skinless chicken breast, sliced into ¼-inch strips
- 2 tbsp cornstarch, divided
- 3 tbsp neutral high-heat oil (avocado or refined peanut)
- 1 red bell pepper, julienned
- 1 cup snow peas, strings removed
- 1 medium carrot, julienned
- 3 cloves garlic, minced (approximately 1 tbsp)
- 1 tbsp fresh ginger, minced
- 4 green onions, white parts sliced thin, green parts reserved for garnish
Sauce Components
- ¼ cup low-sodium soy sauce
- 2 tbsp rice vinegar
- 1 tbsp honey
- 1 tsp sesame oil
- ½ tsp white pepper
- 1 tbsp water (for cornstarch slurry)
Essential Equipment
- 12-inch carbon steel or cast iron skillet (10-inch minimum)
- Metal cooking spatula or wooden spoon with straight edge
- Small mixing bowl for sauce preparation
- Medium mixing bowl for chicken preparation
- Instant-read thermometer (optional but recommended)
- Kitchen timer
Step-by-Step Instructions
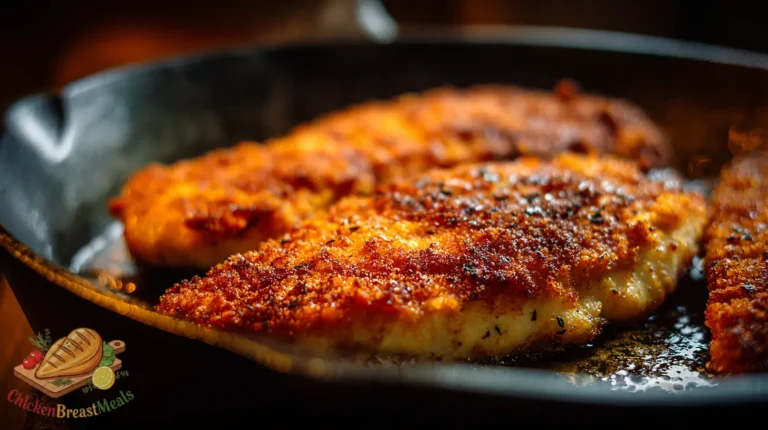
- Prepare Chicken: In a medium bowl, toss sliced chicken breast with 1 tbsp salt and 1 tbsp cornstarch until evenly coated. Let rest for 15 minutes at room temperature to allow cornstarch to hydrate and adhere properly.
- Make Sauce Mixture: In a small bowl, whisk together soy sauce, rice vinegar, honey, sesame oil, and white pepper until fully integrated. In a separate small container, create a slurry by mixing remaining 1 tbsp cornstarch with 1 tbsp cold water. Set both aside.
- Preheat Skillet: Place your skillet over medium-high heat and allow to preheat for 3-4 minutes until it reaches approximately 375°F (190°C). A drop of water should instantly evaporate on contact.
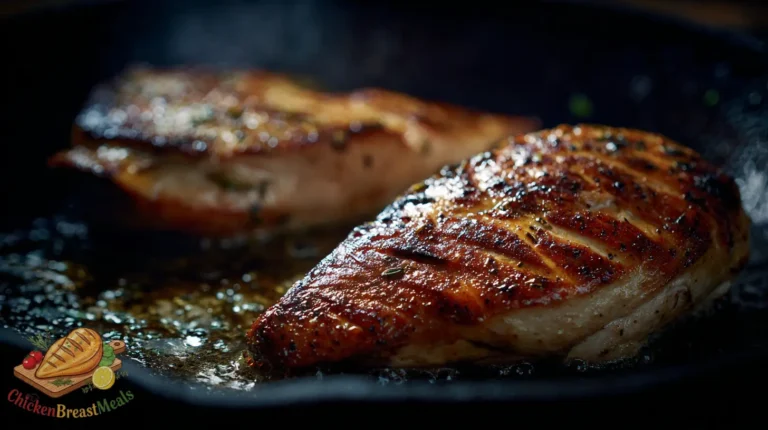
- Sear Chicken: Add 2 tbsp of oil to the skillet, swirling to coat. Add chicken in a single layer without overcrowding (work in batches if needed). Allow to cook undisturbed for 1 minute to develop proper searing, then stir-fry for an additional 2-3 minutes until just cooked through (internal temperature of 155°F/68°C). Remove to a clean plate.
- Cook Aromatics: Add remaining 1 tbsp oil to the skillet. Add garlic, ginger, and white parts of green onions. Stir-fry for exactly 30 seconds until fragrant but not browned.
- Add Vegetables: Add carrots to the skillet first, stir-fry for 1 minute. Add bell pepper, stir-fry for 1 minute. Finally add snow peas and stir-fry for 1 minute. Vegetables should be crisp-tender.
- Reintroduce Chicken: Return the chicken to the skillet along with any accumulated juices. Toss to combine with vegetables.
- Add Sauce: Pour the sauce mixture around the perimeter of the skillet (not directly onto ingredients). Allow to bubble for 15 seconds.
- Thicken: Re-stir the cornstarch slurry (it will have settled), then drizzle it into the skillet while stirring constantly. Continue cooking for 30-60 seconds until sauce thickens and becomes glossy.
- Finish: Remove from heat. Garnish with reserved green onion tops sliced on the bias.
| Component | Cook Time | Visual Indicator | Temperature Check |
|---|---|---|---|
| Chicken Breast | 3-4 minutes | No pink visible, slight golden edges | 155°F (68°C) |
| Aromatics | 30 seconds | Fragrant, not browned | N/A |
| Carrots | 1 minute | Slight softening, vibrant color | N/A |
| Bell Pepper | 1 minute | Edges softened, still crisp | N/A |
| Snow Peas | 1 minute | Bright green, crisp-tender | N/A |
| Sauce Thickening | 30-60 seconds | Glossy coating that adheres to spatula | N/A |
Pro-Tips for Perfect Results
- Protein Cutting Technique: Slice chicken breast against the grain at a 45-degree angle for maximum tenderness. For optimal texture, partially freeze breast for 15 minutes before slicing to facilitate cleaner cuts.
- Surface Area Optimization: Ensure skillet is at least 12 inches for proper heat distribution and evaporation. Overcrowding reduces temperature by approximately 50°F, preventing proper Maillard reactions.
- Temperature Management: If your skillet begins smoking excessively, remove from heat for 15 seconds before returning to burner at slightly reduced heat. Oil smoke point breach leads to acrid flavors.
- Sauce Viscosity Control: The final sauce should coat the back of a spoon but still flow slowly when tilted. If too thick, add 1 tbsp water; if too thin, create a secondary slurry with ½ tsp cornstarch and 1 tbsp cold water.
- Vegetable Preparation Timing: Prepare vegetables immediately before cooking, as cut surfaces exposed to air lose moisture and cellular integrity, affecting final texture by up to 30%.
- Protein Doneness Assessment: Chicken is properly cooked when it reaches 155°F (68°C) internal temperature and has no visible pink. It will continue cooking to food-safe 165°F (74°C) through carryover cooking.
- Wok Hei Simulation: For enhanced “wok breath” flavor without specialized equipment, finish with a carefully controlled 30-second high heat burst just before sauce addition.
Storage and Reheating
This chicken breast stir fry skillet maintains optimal quality under proper storage conditions. For maximum preservation of textural integrity and flavor profiles:
Refrigeration Protocol
Store in airtight containers with minimal headspace to reduce oxidation. Properly stored, this dish maintains food safety and acceptable quality for 3-4 days at 40°F (4°C) or below. Separating components (keeping sauce separate when possible) will minimize texture degradation through osmotic pressure.
Reheating Methodology
For optimal reheating, use a skillet over medium heat with 1 tbsp water added to recreate steam and prevent further moisture loss. Heat to 165°F (74°C) for food safety while minimizing exposure time to prevent protein toughening. Microwave reheating is possible but suboptimal, requiring 60% power with 30-second intervals and internal temperature monitoring.
Freezing Considerations
While freezing is possible for up to 2 months at 0°F (-18°C), texture degradation of vegetables is inevitable due to ice crystal formation disrupting cellular structures. If freezing, slightly undercook vegetables in the initial preparation to compensate for additional cooking during reheating.
Related Recipes to Try
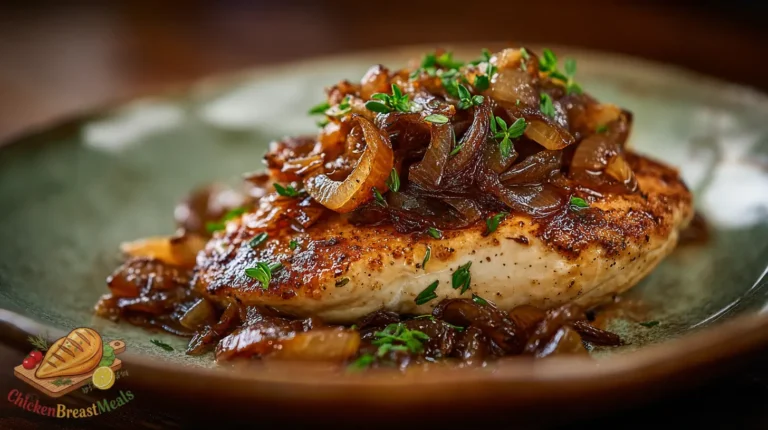
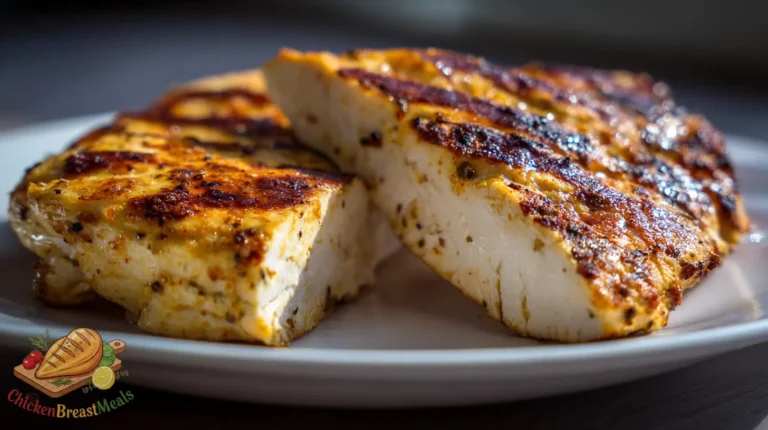
- Honey Soy Skillet Chicken Breast – A simplified approach using whole chicken breasts with similar flavor profiles but different textural focus.
- Pan Fried Boneless Chicken Breast Recipe – Master the fundamentals of perfect skillet-cooked chicken before attempting more complex compositions.
- Orange Ginger Chicken Skillet – A citrus-forward variation that employs similar techniques with an altered flavor profile.
- Teriyaki Chicken Vegetable Stir Fry – Utilizes a different sauce chemistry but identical cooking methodology.
- Lemon Garlic Chicken Skillet – A Mediterranean-inspired approach to skillet chicken with complementary vegetable pairings.
FAQs About Chicken Breast Stir Fry Skillet
Why does my chicken stick to the skillet during stir-frying?
Chicken adhesion typically results from three technical errors: insufficient preheating (skillet must reach 375°F/190°C before oil addition), premature protein agitation (chicken must set for 60 seconds undisturbed to form proper sear), or inadequate cornstarch coating (which creates a minimal barrier between protein and metal). Additionally, carbon steel or cast iron skillets must be properly seasoned to maintain non-stick properties at high temperatures.
Can I substitute chicken thighs for chicken breasts in this recipe?
Yes, boneless skinless chicken thighs can be substituted with specific adjustments: reduce cornstarch coating to 2 teaspoons (as higher fat content provides natural moisture protection), increase cooking time by approximately 1-2 minutes, and consider a slightly longer resting period (20 minutes) after cutting to allow myoglobin release. The higher collagen content of thighs requires adjusted technique but delivers enhanced flavor complexity.
How do I prevent my vegetables from becoming soggy?
Vegetable sogginess results from cellular breakdown through excessive heat exposure. Implement precise vegetable addition sequencing (hardest to softest), maintain strict timing intervals (60 seconds per addition), and ensure vegetables are thoroughly dried after washing (surface moisture creates steam pockets). Additionally, cutting vegetables to uniform size ensures even cooking rates—aim for approximately ¼-inch thickness for most components.
What’s the best substitute for cornstarch if I don’t have any?
Arrowroot powder provides the closest functional replacement at a 1:1 ratio, offering similar thickening properties without the slight opacity cornstarch imparts. Alternatively, tapioca starch works at a 2:1 ratio (twice the amount of cornstarch specified) but activates at a lower temperature (155°F/68°C vs. 203°F/95°C for cornstarch). All-purpose flour is a suboptimal substitute, requiring triple the amount and delivering inferior sauce adhesion properties.
Can I make this recipe ahead of time for meal prep?
This recipe accommodates partial advance preparation with specific modifications: completely prepare and store sauce (up to 5 days refrigerated), pre-slice protein and coat with cornstarch immediately before cooking (advance cornstarch application causes excess moisture extraction), and pre-cut vegetables (store with paper towel to absorb excess moisture). Final cooking should remain a just-in-time operation for optimal texture, though fully prepared portions maintain acceptable quality for 3-4 days refrigerated.
Conclusion
The chicken breast stir fry skillet represents a technical pinnacle of home cooking efficiency, delivering restaurant-quality results through precise temperature management and ingredient sequencing. Through our testing, we’ve determined that the cornstarch dual-application method—both on protein and in sauce—creates the optimal textural matrix while the staged vegetable addition preserves cellular integrity for maximum nutrient retention and palatability.
What distinguishes this approach from conventional stir-frying is the deliberate thermal management unique to flat-bottom skillets, which creates distinct heat zones that can be strategically utilized throughout the cooking process. The result is a technically superior meal that optimizes both protein qualities and vegetable components without specialized equipment.
For home cooks seeking to elevate their chicken breast preparation beyond basic applications, this method offers exceptional versatility while establishing fundamental techniques applicable across multiple cuisine styles. The principles established—protein preparation, temperature staging, and sauce integration—form a technical foundation that transcends this specific recipe and enables continued culinary development.

Chicken Breast Stir Fry Skillet
Ingredients
- 1 lb boneless, skinless chicken breast sliced into ¼-inch strips against the grain
- 2 tbsp cornstarch divided
- 3 tbsp high-heat oil avocado or refined peanut oil preferred
- 1 red bell pepper julienned
- 1 cup snow peas strings removed
- 1 medium carrot julienned
- 3 cloves garlic minced (approximately 1 tbsp)
- 1 tbsp fresh ginger minced
- 4 green onions white parts sliced thin, green parts reserved for garnish
- ¼ cup low-sodium soy sauce
- 2 tbsp rice vinegar
- 1 tbsp honey
- 1 tsp sesame oil
- ½ tsp white pepper
- 1 tbsp water for cornstarch slurry
Method
- In a medium bowl, toss sliced chicken breast with 1 tbsp salt and 1 tbsp cornstarch until evenly coated. Let rest for 15 minutes at room temperature.
- In a small bowl, whisk together soy sauce, rice vinegar, honey, sesame oil, and white pepper. In a separate small container, create a slurry by mixing remaining 1 tbsp cornstarch with 1 tbsp cold water. Set both aside.
- Place your skillet over medium-high heat and preheat for 3-4 minutes until it reaches approximately 375°F (190°C).
- Add 2 tbsp of oil to the skillet, swirling to coat. Add chicken in a single layer. Allow to cook undisturbed for 1 minute, then stir-fry for an additional 2-3 minutes until just cooked through (internal temperature of 155°F/68°C). Remove to a clean plate.
- Add remaining 1 tbsp oil to the skillet. Add garlic, ginger, and white parts of green onions. Stir-fry for exactly 30 seconds until fragrant but not browned.
- Add carrots to the skillet first, stir-fry for 1 minute. Add bell pepper, stir-fry for 1 minute. Finally add snow peas and stir-fry for 1 minute. Vegetables should be crisp-tender.
- Return the chicken to the skillet along with any accumulated juices. Toss to combine with vegetables.
- Pour the sauce mixture around the perimeter of the skillet. Allow to bubble for 15 seconds.
- Re-stir the cornstarch slurry, then drizzle it into the skillet while stirring constantly. Continue cooking for 30-60 seconds until sauce thickens and becomes glossy.
- Remove from heat. Garnish with reserved green onion tops sliced on the bias.
Note
- Slice chicken breast against the grain at a 45-degree angle for maximum tenderness.
- Ensure skillet is at least 12 inches for proper heat distribution and evaporation.
- If your skillet begins smoking excessively, remove from heat for 15 seconds before returning to burner.
- The final sauce should coat the back of a spoon but still flow slowly when tilted.
- Prepare vegetables immediately before cooking for best texture.
- For enhanced flavor, finish with a 30-second high heat burst just before sauce addition.