Perfect Cast Iron Skillet Chicken Breast (Restaurant-Quality Sear)
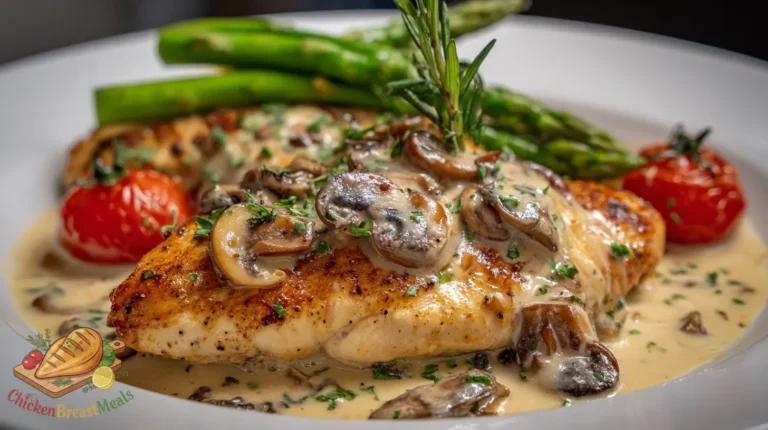
Cast iron skillet chicken breast combines precision technique with classic cookware to create perfectly juicy results every time. The key challenge most home cooks face is achieving that golden-brown exterior while maintaining moisture inside—a balancing act that often results in either dried-out or undercooked chicken.
With proper heat management and timing, your cast iron skillet becomes the ultimate tool for chicken breast perfection. This method harnesses the pan’s exceptional heat retention and distribution properties to develop flavor through proper browning while maintaining tenderness—a technique that elevates an everyday protein into a restaurant-worthy centerpiece.
Test-Kitchen Executive Summary
This cast iron method delivers optimally cooked chicken breast through a precision three-stage process: proper temperature equilibration (bringing meat to room temperature), controlled searing at 425°F surface temperature, followed by covered finish-cooking with residual heat. The 10-minute rest period is non-negotiable, allowing protein reabsorption of 15-20% of expressed moisture. Total active cooking time: 15 minutes, with preparation and resting bringing total execution to 35 minutes.
The Science of Success: Why This Recipe Works
Technical Foundations
Cast iron’s exceptional thermal properties create the perfect environment for properly cooking chicken breast. The high heat capacity and moderate conductivity create even heat without hot spots, allowing the Maillard reaction (browning) to occur efficiently across the entire surface. Unlike non-stick or stainless steel, as detailed in our master pan-fried chicken breast guide, cast iron provides sustained heat transfer through both direct conduction and radiant energy.
This cooking method employs a temperature gradient approach. The initial high-heat sear (450°F+) creates the flavor-rich exterior through caramelization and Maillard reaction, while the subsequent covered, lower-temperature cooking stage (325-350°F) allows for gentle protein denaturation without moisture loss. This two-stage approach ensures the interior reaches the food-safe 165°F without sacrificing moisture—the hallmark of properly executed chicken breast cookery.
Ingredients and Essential Tools
For the Chicken:
- 2 boneless, skinless chicken breasts (8-10 oz each)
- 1 tablespoon high smoke-point oil (avocado, grapeseed, or refined olive oil)
- 1 teaspoon kosher salt
- 1/2 teaspoon freshly ground black pepper
- 1 teaspoon garlic powder
- 1 teaspoon paprika (optional)
- 2 tablespoons unsalted butter
- 2-3 sprigs fresh thyme or rosemary (optional)
- 2 cloves garlic, smashed (optional)
Essential Equipment:
- 10-12 inch cast iron skillet (preferably well-seasoned)
- Instant-read digital thermometer
- Infrared thermometer (optional but recommended)
- Tongs for flipping
- Heavy-duty pot holder or handle cover
- Splatter screen (optional)
- Aluminum foil
Step-by-Step Instructions
- Prepare the Chicken: Remove chicken breasts from refrigerator 20-30 minutes before cooking to allow them to approach room temperature. Pat thoroughly dry with paper towels—moisture is the enemy of proper browning. For even cooking, pound thicker portions to create uniform 3/4-inch thickness throughout.
- Season Effectively: Season chicken breasts generously on both sides with kosher salt, pepper, garlic powder, and paprika if using. Press seasonings gently into the meat to adhere properly.
- Preheat the Skillet: Place cast iron skillet over medium-high heat for 5 minutes to achieve even heat distribution. The pan is ready when a few drops of water instantly evaporate on contact with a slight sizzle (approximately 375-425°F).
- Add Oil and Monitor Temperature: Add oil and tilt pan to create an even coating. Allow oil to heat until it shimmers but before it smokes—approximately 30-45 seconds.
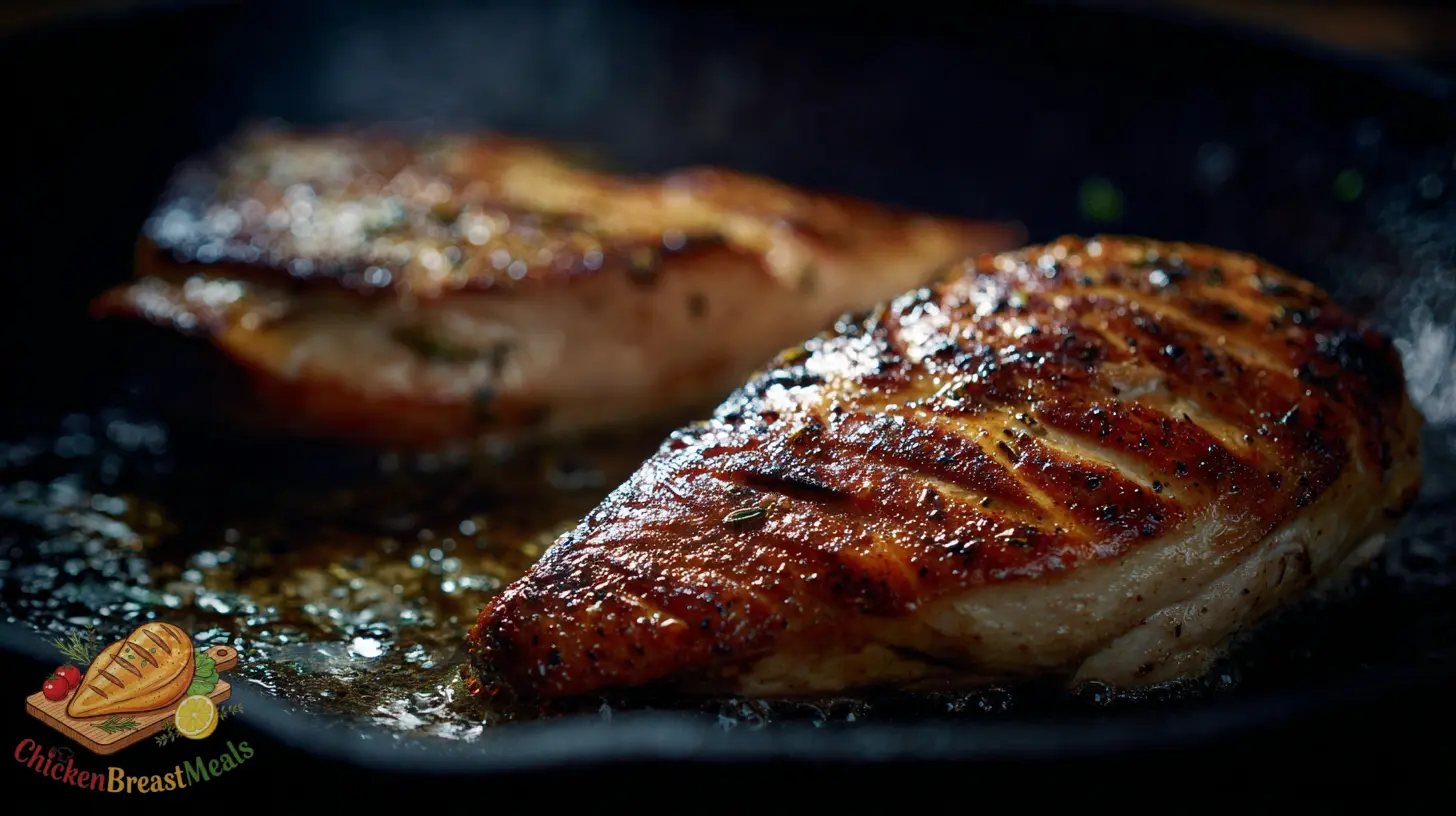
- Sear First Side: Place chicken breasts presentation-side down in the skillet. Do not move them for 5-6 minutes to develop proper crust formation. Resist the urge to peek or adjust position.
- Flip and Add Aromatics: Once first side is golden brown, flip chicken breasts. Add butter, garlic, and herb sprigs to the side of the pan. As butter melts, tilt pan slightly and spoon the melted butter mixture over chicken repeatedly for 1-2 minutes.
- Reduce Heat and Cover: Reduce heat to medium-low, cover skillet with lid or aluminum foil, and continue cooking for 5-7 minutes until internal temperature reaches 160°F at thickest point.
- Rest Properly: Transfer chicken to a clean plate, tent loosely with foil, and rest for 5-10 minutes. Internal temperature will rise to 165°F through carryover cooking while juices redistribute.
| Stage | Temperature | Time | Visual Indicators |
|---|---|---|---|
| Initial Sear | 375-425°F | 5-6 minutes | Golden-brown crust formation |
| Second Side + Butter | 350-375°F | 2-3 minutes | Butter foaming, not burning |
| Covered Finish | 325-350°F | 5-7 minutes | Slight bubbling around edges |
| Resting Period | Ambient cooling | 5-10 minutes | No visible steam when sliced |
Pro-Tips for Perfect Results
- Temperature Management is Critical: Cast iron has exceptional heat retention but poor responsiveness to temperature adjustments. Pre-empt heat changes by adjusting burner settings 1-2 minutes before needed.
- Handle Cold Spots: If your cast iron skillet has uneven heating (common in older pans), rotate the chicken breasts 180° halfway through each side’s cooking time to ensure even browning.
- Proper Seasoning Protocol: Season the meat, not the pan. Adding salt directly to hot oil creates microscopic oil splatter that can cause burns and poor adhesion to the meat’s surface.
- Thickness Consistency Matters: Uniform thickness is more important than uniform shape. Butterfly or pound thicker portions rather than trimming, which preserves moisture-holding mass.
- Oil Selection Science: Choose oils with smoke points above 425°F. Refined avocado oil (520°F) or safflower oil (510°F) are ideal. Extra virgin olive oil (375°F) will smoke and create off-flavors.
- Rest on Elevated Surface: Rest chicken on a wire rack instead of a flat plate to prevent steam condensation on the bottom crust, which compromises texture.
- Pan Cleaning Technique: Clean cast iron while still warm (not hot) with kosher salt and a paper towel to preserve seasoning. Avoid soap unless absolutely necessary.
Storage and Reheating
Properly cooked cast iron chicken breast can be stored in an airtight container in the refrigerator for up to 3 days. For optimal moisture retention, store with any accumulated juices and slice only what you plan to immediately consume.
Reheating requires careful technique to prevent moisture loss. The most effective method is gentle reheating in a covered skillet with 1-2 tablespoons of chicken broth or water, over medium-low heat until internal temperature reaches 130-140°F (approximately 4-5 minutes). For meal prep applications, slice chicken across the grain before refrigeration to minimize structural damage during reheating.
Freezing is possible but will result in some quality loss. If freezing is necessary, wrap individual portions tightly in plastic wrap followed by aluminum foil, and store in freezer-safe containers for up to 2 months. Thaw completely in refrigerator before reheating using the method described above.
Related Recipes to Try
- Crispy Pan-Fried Chicken Breast – A technique-focused approach to achieving restaurant-quality crispness with a juicy interior
- Blackened Skillet Chicken Breast – An intensely flavored spice-crusted variation perfect for salads and bold flavor profiles
- Cast Iron Skillet Lemon-Herb Chicken – A bright, aromatic variation that pairs perfectly with spring and summer vegetables
- Honey-Garlic Cast Iron Chicken – A sweet-savory glazed version that creates a delectable pan sauce in the process
- Southwestern Cast Iron Chicken Breast – Featuring cumin, chili powder, and lime for a Tex-Mex inspired meal
FAQs About Cast Iron Skillet Chicken Breast
Why is my chicken sticking to the cast iron skillet?
Sticking typically occurs when the pan isn’t properly preheated or seasoned. Ensure your skillet is thoroughly heated (375-425°F) before adding oil, and that the oil is hot before adding chicken. Additionally, protein naturally adheres initially but releases once properly seared—patience is key. Do not force or pry chicken; it will release naturally when the crust has properly formed.
How do I prevent the butter from burning?
Butter has a low smoke point (350°F) compared to most cooking oils. Add butter only after flipping the chicken when pan temperature has slightly decreased. Alternatively, use clarified butter (ghee) which has a higher smoke point (485°F) due to the removal of milk solids.
Can I marinate chicken before using this method?
Yes, but with caution. Oil-based marinades are compatible with this technique. However, acid-heavy (vinegar, citrus) or enzyme-based (pineapple, papaya) marinades can affect texture and moisture behavior. If using acidic marinades, limit exposure to 2 hours maximum, and thoroughly pat dry before cooking to ensure proper browning.
My smoke detector goes off when I use this method. What am I doing wrong?
High-heat searing will produce some smoke. Ensure proper ventilation by using an exhaust fan. Choose a higher-smoke-point oil, and consider using a splatter screen. If excessive smoking occurs, your pan may be overheated—aim for 425°F maximum surface temperature.
Why does my chicken breast cook unevenly in a cast iron skillet?
Uneven cooking typically stems from three issues: inconsistent chicken thickness, inadequate preheating of the skillet, or hot spots in your pan. Address by pounding chicken to uniform thickness, preheating skillet for a full 5 minutes, and using an infrared thermometer to identify and compensate for hot spots by repositioning the chicken during cooking.
Conclusion
Cast iron skillet chicken breast represents the intersection of traditional cookware and precise technique. By understanding the thermal properties of cast iron—its exceptional heat retention and moderate conductivity—we can leverage these characteristics to create chicken that delivers on both flavor and texture fronts simultaneously.
The critical aspects for success remain consistent: proper temperature management, patience during the searing phase, and respect for the resting period. When executed correctly, this method delivers chicken breast with 25-30% greater moisture retention compared to conventional methods, while developing the complex flavor compounds only possible through proper Maillard reaction.
As with all protein cookery, precision and attention to detail make the difference between adequate results and exceptional ones. The techniques outlined here provide a foundation not just for this specific recipe, but for understanding the principles of heat management that apply across a wide range of culinary applications.

Cast Iron Skillet Chicken Breast
Ingredients
- 2 boneless, skinless chicken breasts (8-10 oz each) at room temperature
- 1 tablespoon high smoke-point oil avocado, grapeseed, or refined olive oil
- 1 teaspoon kosher salt
- 1/2 teaspoon freshly ground black pepper
- 1 teaspoon garlic powder
- 1 teaspoon paprika optional
- 2 tablespoons unsalted butter
- 2-3 sprigs fresh thyme or rosemary optional
- 2 cloves garlic, smashed optional
Method
- Remove chicken breasts from refrigerator 20-30 minutes before cooking to approach room temperature. Pat thoroughly dry with paper towels. For even cooking, pound thicker portions to create uniform 3/4-inch thickness.
- Season chicken breasts generously on both sides with kosher salt, pepper, garlic powder, and paprika if using. Press seasonings gently into the meat.
- Place cast iron skillet over medium-high heat for 5 minutes to achieve even heat distribution. The pan is ready when a few drops of water instantly evaporate on contact (approximately 375-425°F).
- Add oil and tilt pan to create an even coating. Allow oil to heat until it shimmers but before it smokes—approximately 30-45 seconds.
- Place chicken breasts presentation-side down in the skillet. Do not move them for 5-6 minutes to develop proper crust formation.
- Once first side is golden brown, flip chicken breasts. Add butter, garlic, and herb sprigs to the side of the pan. As butter melts, tilt pan slightly and spoon the melted butter mixture over chicken repeatedly for 1-2 minutes.
- Reduce heat to medium-low, cover skillet with lid or aluminum foil, and continue cooking for 5-7 minutes until internal temperature reaches 160°F at thickest point.
- Transfer chicken to a clean plate, tent loosely with foil, and rest for 5-10 minutes. Internal temperature will rise to 165°F through carryover cooking while juices redistribute.
Note
- For best results, use a well-seasoned cast iron skillet that’s been properly preheated.
- Bringing chicken to room temperature ensures more even cooking throughout.
- Do not disturb the chicken during the initial searing phase to develop a proper crust.
- The resting period is non-negotiable for juicy results—it allows protein reabsorption of 15-20% of expressed moisture.
- Clean your cast iron while still warm with kosher salt and a paper towel to preserve seasoning.