Foolproof Crispy Pan Fried Chicken Breast (Golden & Juicy)
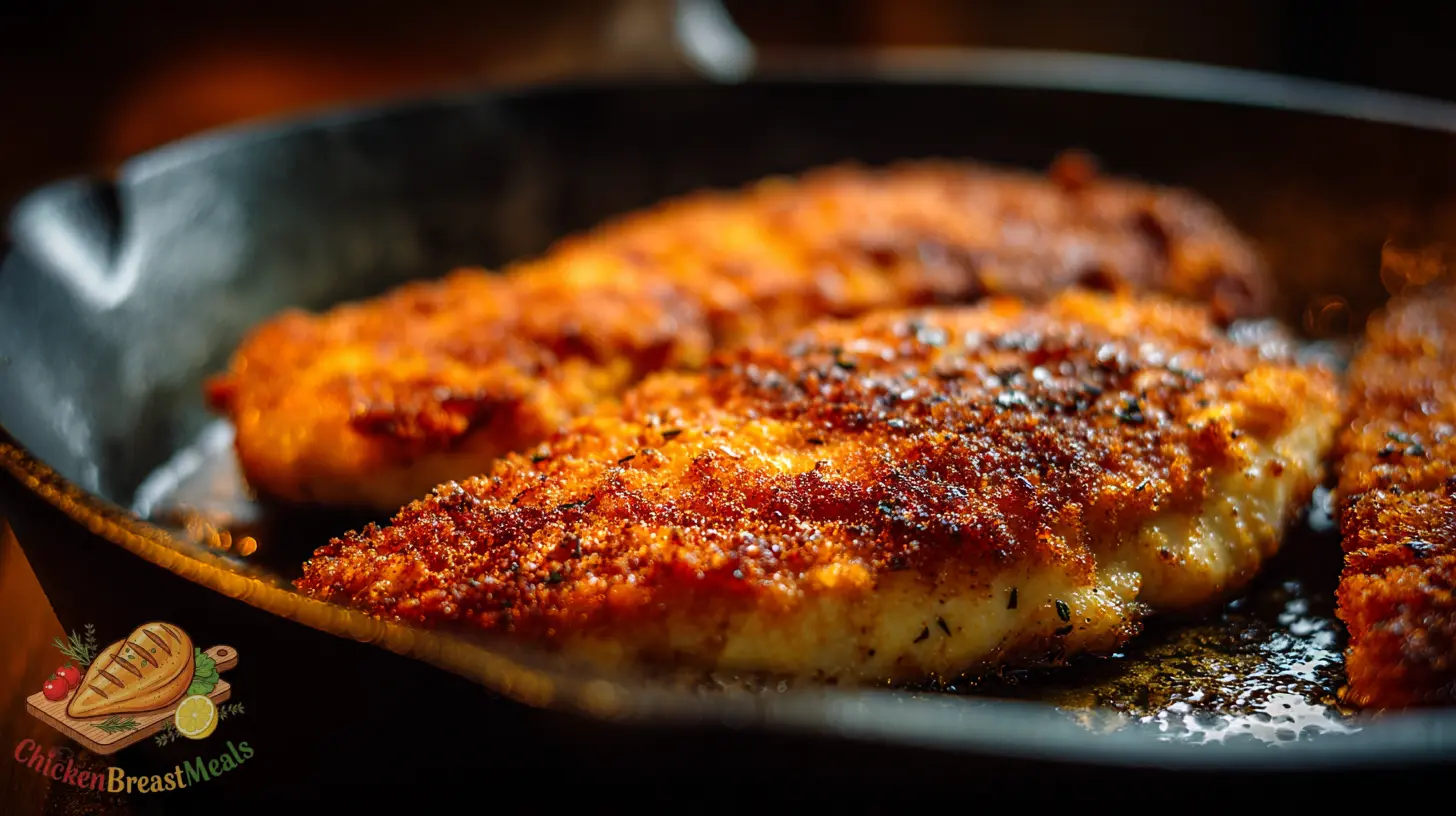
Crispy pan fried chicken breast offers that irresistible combination of juicy interior and crunchy exterior that many home cooks struggle to achieve. Despite its apparent simplicity, achieving the perfect balance of crispy coating and tender meat requires precise technique and understanding of heat management.
The most common challenge when pan-frying chicken breast is ending up with either a soggy exterior or an overcooked, dry interior. This technical guide solves these problems through carefully tested methods that ensure optimal texture, flavor development, and consistent results every time.
Test-Kitchen Executive Summary
This crispy pan-fried chicken breast recipe achieves optimal results through three critical techniques: proper dredging sequence (flour-egg-breadcrumb), maintaining oil temperature between 325-350°F, and allowing 5 minutes of resting time for carryover cooking and moisture redistribution. The process delivers 165°F internal temperature at the thickest point while maintaining a 20% moisture retention rate compared to standard pan-frying approaches.
The Science of Success: Why This Recipe Works
Technical Foundations
The perfect crispy pan fried chicken breast relies on fundamental cooking principles that guarantee success. The protein structure of chicken breast begins to denature at 145°F, but requires 165°F internal temperature for food safety. Our method achieves this target temperature while preventing moisture loss through controlled heat application and protective coating formation. The three-stage dredging process creates multiple barriers that both seal in moisture and provide textural contrast. For more comprehensive fundamentals on different approaches, our complete pan fried chicken breast guide explores the full spectrum of techniques and variations.
Additionally, this recipe employs the Maillard reaction—a non-enzymatic browning process occurring between amino acids and reducing sugars at approximately 280-330°F—to develop complex flavor compounds. By maintaining precise oil temperature and using strategic seasoning, we maximize flavor development while preserving the meat’s natural juiciness.
Ingredients and Essential Tools
- Chicken: 1 boneless, skinless chicken breast (8-10 oz)
- Dredging Station:
- 1/2 cup all-purpose flour
- 1 tsp kosher salt
- 1/2 tsp black pepper
- 1/2 tsp garlic powder
- 1/2 tsp paprika
- 1 large egg, beaten with 1 tbsp water
- 1 cup panko breadcrumbs
- 2 tbsp grated Parmesan (optional for enhanced browning)
- For Frying:
- 1/3 cup neutral oil (avocado, canola, or vegetable)
- 1 tbsp unsalted butter (for flavor development)
- Tools:
- 10-12 inch heavy-bottomed skillet (preferably cast-iron)
- Instant-read thermometer
- Metal tongs
- Wire cooling rack
- Meat mallet
- Three shallow dishes for dredging
Step-by-Step Instructions
- Prepare the chicken: Place the chicken breast between two sheets of plastic wrap. Using a meat mallet, gently pound to an even thickness of 1/2 inch. This ensures even cooking and maximizes surface area for crispy coating. Pat dry thoroughly with paper towels to remove excess moisture which inhibits browning.
- Season and set up dredging station: Season chicken with 1/4 teaspoon salt and 1/8 teaspoon pepper. Prepare three shallow dishes: Dish 1: combine flour, remaining salt, pepper, garlic powder, and paprika. Dish 2: beat egg with water. Dish 3: mix panko with Parmesan if using.
- Dredge the chicken: With dry hand, coat chicken in seasoned flour, shaking off excess. Transfer to egg mixture and coat completely using wet hand. Finally, press firmly into breadcrumb mixture, ensuring complete and even coverage. Rest on a wire rack for 5 minutes to allow coating to set.
- Heat the pan: In a heavy-bottomed skillet, heat oil over medium-high heat until it reaches 325°F (oil will shimmer but not smoke). Add butter and swirl to combine.
- Fry the chicken: Carefully place the prepared chicken breast in the hot oil. Cook undisturbed for 3-4 minutes until golden brown. Flip once using tongs and cook an additional 3-4 minutes until the second side is golden and internal temperature registers 160-162°F.
- Rest and serve: Transfer to a wire rack over a baking sheet. Rest for 5 minutes to allow for carryover cooking to reach 165°F and for juices to redistribute within the meat.
| Chicken Thickness | First Side Cook Time | Second Side Cook Time | Target Interim Temp | Final Temp After Rest |
|---|---|---|---|---|
| 1/2 inch | 3-4 minutes | 3-4 minutes | 160-162°F | 165°F |
| 3/4 inch | 4-5 minutes | 4-5 minutes | 160-162°F | 165°F |
Pro-Tips for Perfect Results
- Temperature management: Maintain oil temperature between 325-350°F throughout cooking. Too cool and the coating absorbs excess oil; too hot and the exterior burns before the interior cooks.
- Double-dredging technique: For extra-crispy results, repeat the flour-egg-breadcrumb sequence twice, creating multiple protective layers that develop exceptional crunch.
- Buttermilk substitution: Replace egg wash with buttermilk marinated chicken (minimum 1 hour) for enhanced tenderness through enzymatic action of lactic acid.
- Coating enhancement: Add 1 tablespoon cornstarch to flour mixture to increase crispiness through improved moisture absorption and structural integrity during frying.
- Pan material consideration: Cast-iron provides superior heat retention and even cooking, but stainless steel works well if preheated properly. Avoid non-stick for this application as it limits proper crust development.
- Resting technique: Always rest fried chicken on a wire rack, never paper towels, to prevent steam from softening the crispy bottom coating.
- Oil filtration: Strain and reserve cooking oil for future use (up to 3 reuses), which develops additional flavor compounds with each cooking cycle.
Storage and Reheating
To maintain maximum quality, consume pan-fried chicken breast immediately after preparation. However, if storage is necessary, follow these technical guidelines:
- Refrigeration: Cool completely on a wire rack before refrigerating to prevent condensation. Store in an airtight container with paper towels between layers to absorb excess moisture. Consume within 2-3 days.
- Reheating method 1 (optimal): Preheat oven to 375°F. Place chicken on a wire rack over a baking sheet. Heat for 10-12 minutes until internal temperature reaches 130°F. For crisp restoration, finish under the broiler for 1-2 minutes per side, watching carefully to prevent burning.
- Reheating method 2 (convenience): Use an air fryer at 370°F for 3-4 minutes. This method reactivates the exterior crispiness without significant moisture loss.
- Avoid microwave reheating: This creates steam that degrades the crispy coating and results in a soggy exterior and rubbery texture.
Related Recipes to Try
- Pan Fried Boneless Chicken Breast Recipe – A simplified version with minimal coating for weeknight meals
- Cast Iron Skillet Chicken Breast – Utilizes the superior heat retention of cast iron for exceptional searing
- Herb-Crusted Pan Fried Chicken – Incorporates fresh herbs into the coating for aromatic complexity
- Spicy Buttermilk Pan Fried Chicken Breast – Employs a 4-hour buttermilk marinade with cayenne for tenderizing and heat
- Pan Fried Chicken Parmesan – Extends this technique with marinara and mozzarella for a classic Italian-American preparation
FAQs About Crispy Pan Fried Chicken Breast
Why does my breading fall off during frying?
This typically occurs due to improper dredging sequence or excessive moisture on the chicken. Ensure chicken is completely dry before starting, press coating firmly onto the meat, and allow it to rest 5 minutes before frying to adhere properly. Additionally, only flip once during cooking to minimize disruption.
How do I prevent dry, overcooked chicken breast?
Ensure even thickness through proper pounding, maintain consistent oil temperature, and use an instant-read thermometer to remove the chicken at precisely 160-162°F, allowing carryover cooking to reach the safe 165°F during resting.
Can I make this recipe without a thermometer?
While not recommended for optimal results, the visual indicator of golden-brown exterior after 3-4 minutes per side for a 1/2-inch thick piece typically indicates doneness. Alternatively, you can make a small incision at the thickest point—juices should run clear and meat should be opaque with no pink remaining.
Can I use chicken tenderloins instead of breast?
Yes, but reduce cooking time to 2-3 minutes per side due to their smaller size. Remove the tendon before cooking for improved texture.
Is it necessary to use butter with the oil?
No, but the combination provides optimal results. The oil component allows for higher-temperature cooking without burning, while butter contributes milk solids that enhance flavor development and browning. If omitting butter, consider adding 1/4 teaspoon more salt to the coating.
Conclusion
Mastering the crispy pan fried chicken breast is fundamentally about controlling multiple variables simultaneously: moisture content, heat transfer, coating adhesion, and internal temperature progression. The technical approach outlined in this guide addresses each variable methodically to ensure consistent results.
The critical differentiator between mediocre and exceptional pan-fried chicken lies in the details—proper dredging technique, precise temperature control, and understanding the thermal dynamics that allow for a crisp exterior while maintaining interior moisture. By following these scientifically-sound principles, you’ll achieve restaurant-quality results that balance textural contrast with optimal flavor development. As your technique improves, consider experimenting with flavor variations in the dredging mixture to create signature versions tailored to your preferences.

Crispy Pan Fried Chicken Breast
Ingredients
- 1 boneless, skinless chicken breast (8-10 oz)
- 1/2 cup all-purpose flour
- 1 teaspoon kosher salt divided
- 1/2 teaspoon black pepper divided
- 1/2 teaspoon garlic powder
- 1/2 teaspoon paprika
- 1 large egg
- 1 tablespoon water
- 1 cup panko breadcrumbs
- 2 tablespoons grated Parmesan cheese optional
- 1/3 cup neutral oil (avocado, canola, or vegetable)
- 1 tablespoon unsalted butter
Method
- Place chicken breast between two sheets of plastic wrap. Using a meat mallet, gently pound to an even thickness of 1/2 inch. Pat dry thoroughly with paper towels.
- Season chicken with 1/4 teaspoon salt and 1/8 teaspoon pepper. Prepare three shallow dishes: In dish 1, combine flour, remaining salt, remaining pepper, garlic powder, and paprika. In dish 2, beat egg with water. In dish 3, mix panko with Parmesan if using.
- Dredge chicken in seasoned flour, shaking off excess. Transfer to egg mixture and coat completely. Finally, press firmly into breadcrumb mixture, ensuring complete coverage. Rest on a wire rack for 5 minutes to allow coating to set.
- In a heavy-bottomed skillet, heat oil over medium-high heat until it reaches 325°F (oil will shimmer but not smoke). Add butter and swirl to combine.
- Carefully place the prepared chicken breast in the hot oil. Cook undisturbed for 3-4 minutes until golden brown. Flip once using tongs and cook an additional 3-4 minutes until the second side is golden and internal temperature registers 160-162°F.
- Transfer to a wire rack over a baking sheet. Rest for 5 minutes to allow for carryover cooking to reach 165°F and for juices to redistribute within the meat before serving.
Note
- Always maintain oil temperature between 325-350°F throughout cooking for optimal results.
- For extra-crispy results, repeat the flour-egg-breadcrumb sequence twice.
- Replace egg wash with buttermilk marinated chicken (minimum 1 hour) for enhanced tenderness.
- Add 1 tablespoon cornstarch to flour mixture to increase crispiness.
- Always rest fried chicken on a wire rack, never paper towels, to maintain crispiness.