Juicy Garlic Butter Skillet Chicken Breast (Rich & Aromatic)

Garlic butter skillet chicken breast represents the perfect intersection of simplicity and technical precision. This method produces consistently juicy, flavor-infused chicken with minimal equipment and ingredients—a culinary technique worth mastering for any home cook. The challenge lies in preventing the garlic from burning while ensuring the chicken cooks through properly.
Many home cooks struggle with dry, flavorless chicken breast or bitter, burnt garlic. This recipe solves both problems through precise temperature control, proper timing of garlic addition, and the strategic use of butter as both a flavor vehicle and textural enhancement mechanism.
Test-Kitchen Executive Summary
This garlic butter skillet chicken breast recipe employs a multi-phase cooking approach: initial high-heat sear (450°F surface temperature) followed by temperature reduction (325-350°F) with basting to ensure even cooking while preventing moisture loss. Butter is added mid-cook to prevent burning, with garlic introduced only in the final 2-3 minutes. The result is 165°F internal temperature chicken with golden exterior, aromatic garlic notes, and a silky butter sauce.
The Science of Success: Why This Recipe Works
Technical Foundations
The technical foundation of this recipe centers on heat management and timing. Unlike conventional methods, we employ a two-stage cooking process that first creates a Maillard reaction on the protein surface, then gently completes the cooking with aromatic infusion. As we’ve detailed in our master pan-fried chicken breast guide, controlling surface temperature is crucial for preventing both undercooked centers and dried-out exteriors.
Butter acts as both flavor enhancer and temperature moderator, with its milk solids contributing richness while its 320°F smoke point helps regulate cooking temperature. Garlic compounds (particularly allicin) become bitter when burned, so their delayed addition prevents off-flavors while maximizing aromatic impact.
Ingredients and Essential Tools
- 2 boneless, skinless chicken breasts (8-10 oz each)
- 2 tablespoons neutral oil (avocado or grapeseed preferred)
- 4 tablespoons unsalted butter, divided
- 6-8 garlic cloves, minced (about 2 tablespoons)
- 1 tablespoon fresh thyme leaves (or 1 teaspoon dried)
- 1 teaspoon kosher salt
- 1/2 teaspoon freshly ground black pepper
- 1/4 teaspoon paprika (optional)
- 2 tablespoons fresh parsley, chopped (for garnish)
- 1 lemon, cut into wedges (optional)
Essential Tools:
- 10-12 inch cast iron or heavy stainless steel skillet
- Instant-read meat thermometer
- Kitchen tongs
- Small bowl (for compound butter preparation)
- Sharp knife
- Cutting board
- Metal spoon (for basting)
Step-by-Step Instructions
- Prepare the chicken: Pat chicken breasts completely dry with paper towels. If breasts are thicker than 1 inch, butterfly or pound to even thickness (approximately 3/4 inch). Season both sides with salt, pepper, and paprika if using.
- Heat the skillet: Place cast iron skillet over medium-high heat and add neutral oil. Heat until oil shimmers and reaches approximately 350-375°F (a droplet of water should dance across the surface).
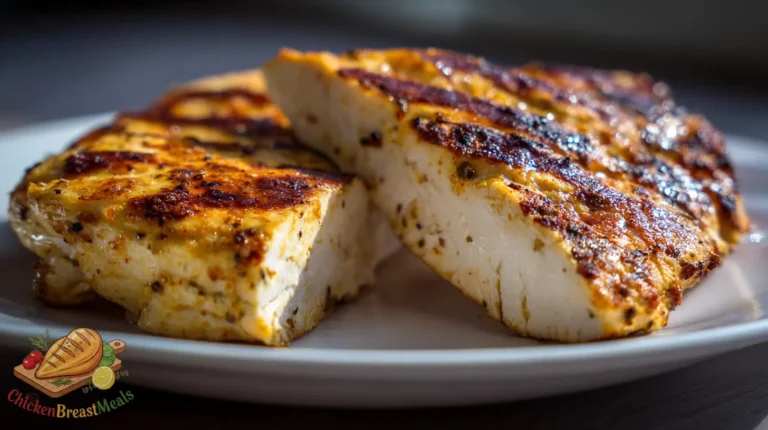
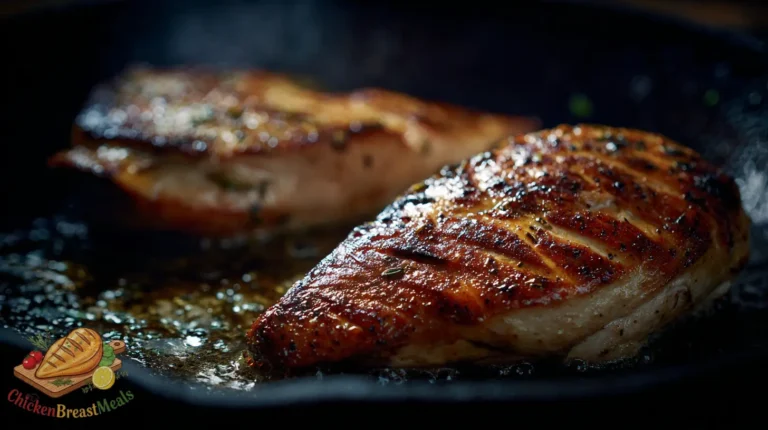
- Initial sear: Carefully place chicken breasts presentation-side down in the hot skillet. Cook undisturbed for 4-5 minutes until a golden crust forms.
- Flip and reduce heat: Flip chicken using tongs, reduce heat to medium, and add 2 tablespoons of butter to the pan. Allow butter to melt completely.
- Begin basting: Tilt the pan slightly to pool the butter, and using a spoon, continuously baste the top of the chicken with the hot butter for 2-3 minutes.
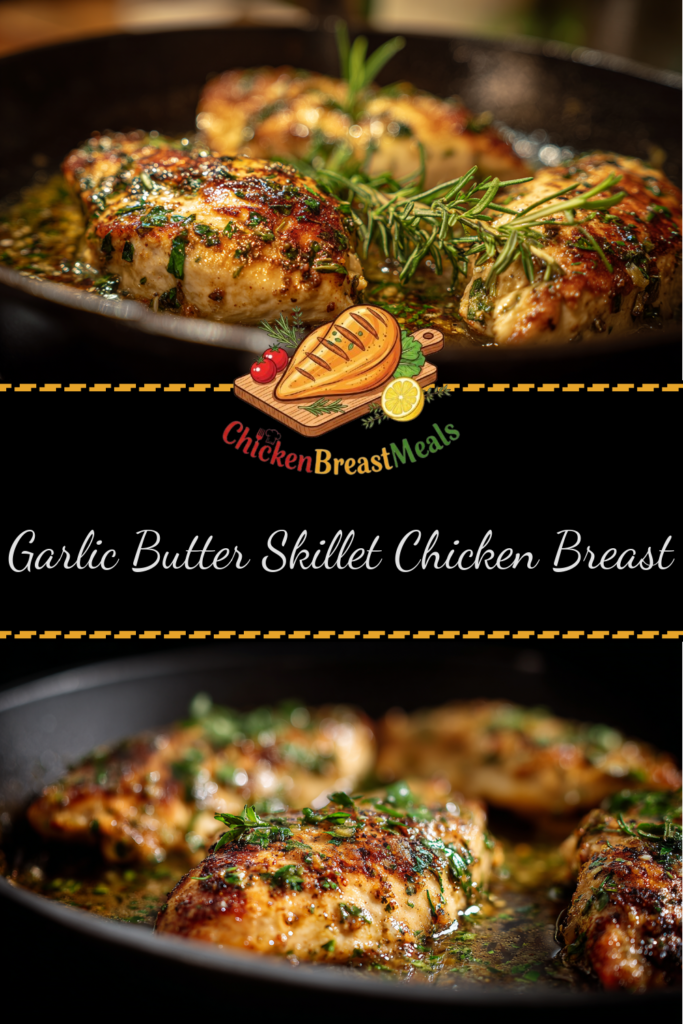
- Add aromatics: Add remaining butter, minced garlic, and thyme to the pan. Continue cooking for 2-3 minutes, basting frequently to prevent garlic from burning.
- Check temperature: Use an instant-read thermometer to verify chicken has reached 163-165°F at the thickest point. If needed, continue cooking and basting until temperature is reached.
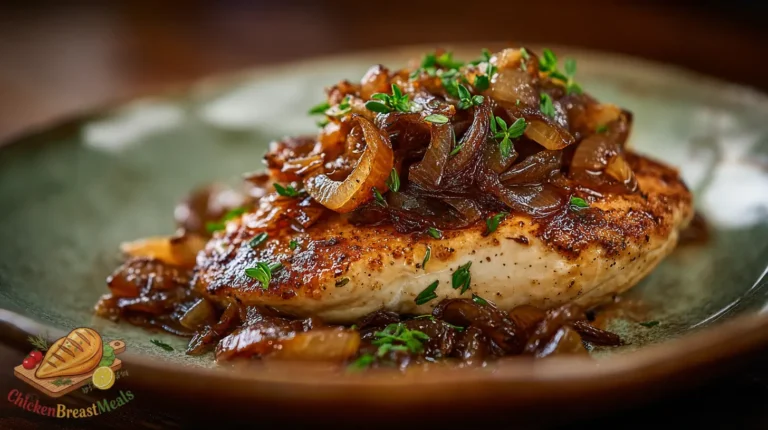
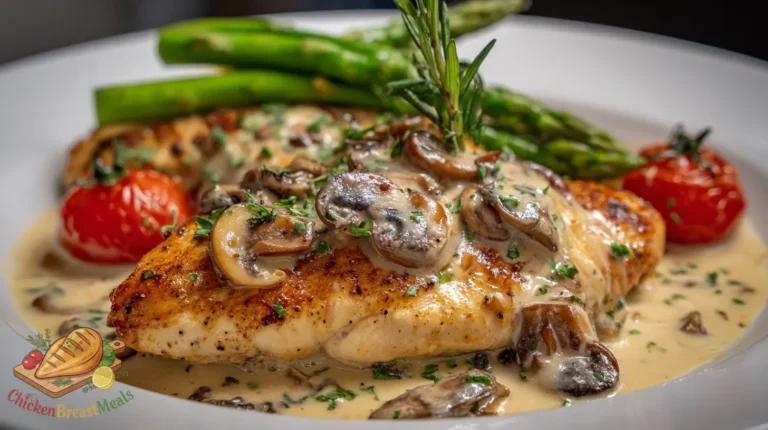
- Rest properly: Remove chicken from skillet and rest on a warm plate for 3-5 minutes. Meanwhile, continue cooking garlic butter sauce for 30-60 seconds until fragrant but not browned.
- Serve: Slice chicken against the grain if desired, drizzle with pan sauce, and garnish with fresh parsley and lemon wedges if using.
| Phase | Temperature | Duration | Visual Cue |
|---|---|---|---|
| Initial Sear | Medium-High (350-375°F) | 4-5 minutes | Golden brown crust |
| Second Side + First Butter | Medium (325-350°F) | 2-3 minutes | Butter fully melted |
| Garlic + Second Butter | Medium-Low (300-325°F) | 2-3 minutes | Garlic fragrant but not brown |
| Final Basting | Medium-Low (300-325°F) | 1-2 minutes | Chicken at 163-165°F internal |
Pro-Tips for Perfect Results
- Temperature equilibration: Remove chicken from refrigerator 20-30 minutes before cooking to promote even cooking from edge to center.
- Surface drying: Pat chicken aggressively dry with paper towels; surface moisture creates steam that prevents proper browning.
- Oil selection rationale: Choose high smoke-point oils (avocado, grapeseed) for the initial sear to prevent bitter flavors. Butter is added later specifically because its lower smoke point would cause burning during the high-heat phase.
- Garlic timing precision: Adding garlic too early will result in bitter, burned notes. The 2-3 minute window is critical—less time won’t develop flavor, while more risks bitterness.
- Basting technique: Spoon hot butter over the chicken’s highest points first, then work downward. This ensures even flavor distribution and temperature management.
- Thickness standardization: Uniform thickness (3/4 inch ideal) enables consistent cooking. Butterflying or gentle pounding with a meat mallet achieves this without damaging protein structure.
- Carry-over cooking awareness: Remove chicken at 163°F as residual heat will raise temperature to safe 165°F during resting period.
Storage and Reheating
Properly stored garlic butter chicken breast maintains quality and safety through specific handling techniques:
Refrigeration (Short-Term): Cool chicken completely before refrigerating in an airtight container. Separate chicken and sauce if possible to prevent soggy texture. Consume within 3-4 days for optimal quality.
Freezing (Long-Term): For extended storage, freeze cooled chicken breasts individually wrapped in plastic, then placed in a freezer bag with air removed. Label with date and consume within 2-3 months. The butter sauce can be frozen separately in ice cube trays, then transferred to freezer bags.
Reheating Protocol: For best results, thaw frozen chicken in refrigerator overnight. Reheat using one of these technical approaches:
- Low-and-slow oven method: Preheat oven to 275°F. Place chicken in a baking dish with 1-2 tablespoons of water or chicken stock, cover tightly with foil, and heat for 15 minutes or until internal temperature reaches 145°F.
- Gentle skillet reheat: Using a non-stick skillet over medium-low heat, add 1 tablespoon water and 1 teaspoon butter. Once butter melts, add chicken and cover. Heat for 2-3 minutes per side until warmed through.
- Sous vide revival (optimal): If available, reheat in vacuum-sealed bag at 140°F for 20-30 minutes to restore original texture without moisture loss.
Related Recipes to Try
- Pan-Fried Boneless Chicken Breast Recipe – Master the foundational technique of perfectly pan-frying chicken without added flavor components.
- Rosemary Garlic Skillet Chicken – An herbaceous variation that complements the garlic notes with piney rosemary depth.
- Lemon Caper Butter Chicken – Introduce bright acidity and briny complexity to the basic garlic butter foundation.
- Brown Butter Sage Chicken Breast – Elevate the flavor profile with nutty brown butter and earthy sage notes.
- Skillet Chicken with White Wine Reduction – Incorporate acidity and depth with a simple pan sauce technique.
FAQs About Garlic Butter Skillet Chicken Breast
Why does my garlic always burn before my chicken is fully cooked?
The garlic burning issue stems from premature addition. Garlic contains high sugar content that caramelizes and burns at temperatures above 350°F. Add garlic only in the final 2-3 minutes of cooking after reducing heat, and keep it moving in the pan through continuous basting.
Can I use boneless chicken thighs instead of breasts?
Yes, thighs can be substituted with slight technical modifications. Increase total cooking time by approximately 2-3 minutes (7-8 minutes first side, 5-6 minutes second side) and cook to an internal temperature of 175°F instead of 165°F for optimal texture. Thighs’ higher fat content provides greater moisture insurance.
How can I prevent the butter from burning?
Implement a two-phase cooking approach: first sear with high smoke-point oil only, then add butter after reducing heat. Additionally, continuously move the butter around the pan and incorporate a small amount of water (1 teaspoon) if butter begins to darken excessively.
Is it better to use fresh or jarred minced garlic for this recipe?
Fresh garlic provides superior flavor development due to intact cell structures that release allicin when cut. Jarred garlic has already released much of its volatile compounds and contains preservatives that can impart off-flavors when exposed to high heat. For technical precision, mince fresh garlic immediately before cooking (10-15 minutes maximum) to maximize flavor potency.
Why is my chicken breast always dry despite following cooking times?
Dryness typically results from one of three technical failures: 1) overcooking past 165°F internal temperature, 2) insufficient thickness standardization leading to thin sections overcooking, or 3) failure to rest the chicken, causing moisture loss. Use an instant-read thermometer, standardize thickness, and implement a mandatory 3-5 minute rest period.
Conclusion
Garlic butter skillet chicken breast represents a technical masterclass in heat management, timing precision, and flavor layering. By separating the cooking process into distinct phases—high-heat sear followed by gentle butter infusion and finally garlic aromatics—we overcome the classic challenges of dry chicken and bitter garlic.
The scientific principles at work—the Maillard reaction for flavor development, lipid-based flavor infusion through basting, and tightly controlled thermal management—create a methodology that yields consistent results. This approach demonstrates that even simple ingredients can produce exceptional outcomes when technical execution is prioritized.
Master this foundational garlic butter technique, and you’ll possess the technical framework to explore countless variations by substituting herbs, incorporating acids, or introducing complementary aromatics. The skillet becomes not just a cooking vessel but a precision instrument for transforming ordinary chicken breast into a reliably exceptional meal.

Garlic Butter Skillet Chicken Breast
Ingredients
- 2 boneless, skinless chicken breasts (8-10 oz each) patted dry
- 2 tablespoons neutral oil avocado or grapeseed preferred
- 4 tablespoons unsalted butter divided
- 6-8 cloves garlic minced (about 2 tablespoons)
- 1 tablespoon fresh thyme leaves or 1 teaspoon dried
- 1 teaspoon kosher salt
- 1/2 teaspoon freshly ground black pepper
- 1/4 teaspoon paprika optional
- 2 tablespoons fresh parsley chopped, for garnish
- 1 lemon cut into wedges, optional
Method
- Pat chicken breasts completely dry with paper towels. If breasts are thicker than 1 inch, butterfly or pound to even thickness (approximately 3/4 inch). Season both sides with salt, pepper, and paprika if using.
- Place cast iron skillet over medium-high heat and add neutral oil. Heat until oil shimmers and reaches approximately 350-375°F.
- Carefully place chicken breasts presentation-side down in the hot skillet. Cook undisturbed for 4-5 minutes until a golden crust forms.
- Flip chicken using tongs, reduce heat to medium, and add 2 tablespoons of butter to the pan. Allow butter to melt completely.
- Tilt the pan slightly to pool the butter, and using a spoon, continuously baste the top of the chicken with the hot butter for 2-3 minutes.
- Add remaining butter, minced garlic, and thyme to the pan. Continue cooking for 2-3 minutes, basting frequently to prevent garlic from burning.
- Use an instant-read thermometer to verify chicken has reached 163-165°F at the thickest point. If needed, continue cooking and basting until temperature is reached.
- Remove chicken from skillet and rest on a warm plate for 3-5 minutes. Meanwhile, continue cooking garlic butter sauce for 30-60 seconds until fragrant but not browned.
- Slice chicken against the grain if desired, drizzle with pan sauce, and garnish with fresh parsley and lemon wedges if using.
Note
- Remove chicken from refrigerator 20-30 minutes before cooking for more even cooking.
- Pat chicken very dry with paper towels; surface moisture prevents proper browning.
- Use high smoke-point oils for the initial sear; butter is added later to prevent burning.
- Adding garlic too early will result in bitter, burned flavors.
- For food safety, ensure chicken reaches 165°F internal temperature.
- Resting chicken for 3-5 minutes is essential to retain juices.