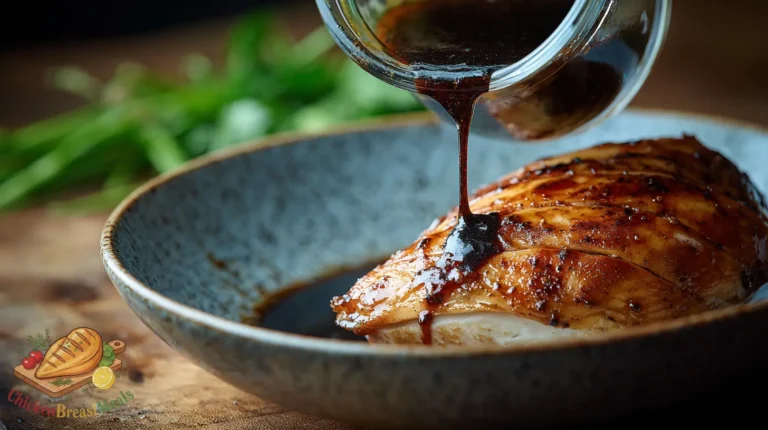
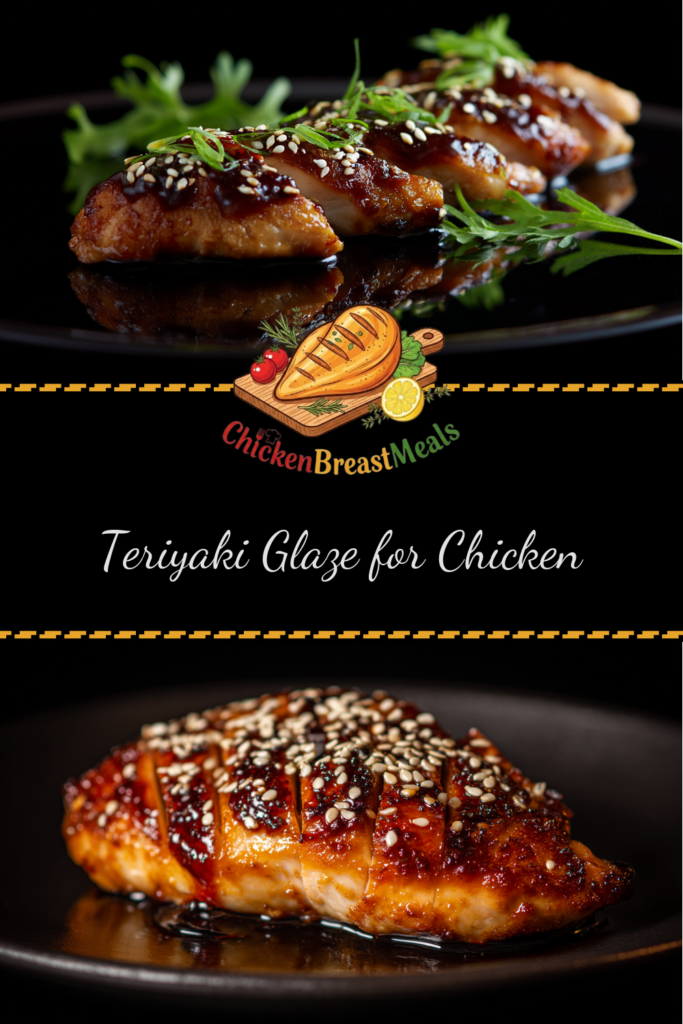
Sticky Teriyaki Glaze for Chicken (Sweet & Savory)

Creating the perfect teriyaki glaze for chicken presents a unique culinary challenge. Too thin, and it slides right off the meat; too thick, and it becomes an overpowering, sticky mess that masks the chicken’s natural flavors. The delicate balance between sweetness and umami depth requires precision and technical understanding.
Many home cooks struggle with achieving that restaurant-quality coating that caramelizes beautifully without burning. Through extensive testing in our kitchen laboratory, we’ve developed a foolproof formula that addresses these common pitfalls while maximizing flavor development and adhesion properties.
Test-Kitchen Executive Summary
This teriyaki glaze achieves optimal adhesion through a precise 2:1:1 ratio of soy sauce, brown sugar, and mirin, with cornstarch added at 1.5% by volume as a thickening agent. The inclusion of garlic and ginger at a 1:1 ratio provides aromatic complexity, while a small amount of sesame oil (2-3%) introduces essential flavor compounds without separation issues. For maximum flavor penetration, the glaze should be reduced to approximately 60% of its original volume, reaching the napé stage where it coats the back of a spoon.
The Science of Success: Why This Recipe Works
Technical Foundations
The effectiveness of this teriyaki glaze lies in its balanced chemistry. Soy sauce provides glutamates and salt for savory depth, while brown sugar contributes not just sweetness but essential Maillard reaction precursors. This reaction—critical for developing complex flavors during high-heat cooking—is what gives properly glazed chicken its characteristic mahogany color and depth of flavor. When applying this to various chicken preparations, including those featured in our comprehensive stuffed and marinated chicken breast guide, the glaze functions optimally when applied in multiple thin layers rather than one thick coat.
The cornstarch suspension creates a colloidal mixture that thickens at precisely 203°F (95°C), ensuring the glaze achieves the ideal viscosity for adhesion. Meanwhile, the acids in rice vinegar and mirin provide not only flavor balance but also help denature surface proteins on the chicken, allowing for better glaze penetration and adherence.
Ingredients and Essential Tools
- 1/2 cup low-sodium soy sauce (118ml)
- 1/4 cup brown sugar, packed (50g)
- 1/4 cup mirin (Japanese sweet rice wine) (59ml)
- 2 tablespoons rice vinegar (30ml)
- 3 cloves garlic, minced (approximately 9g)
- 1 tablespoon fresh ginger, grated (approximately 9g)
- 1 tablespoon cornstarch (7.5g)
- 2 tablespoons cold water (30ml)
- 1 teaspoon sesame oil (5ml)
- 1/4 teaspoon red pepper flakes (optional, for heat) (0.5g)
Essential Tools
- Heavy-bottomed saucepan (preferably with light-colored interior for visual monitoring)
- Whisk
- Silicone spatula
- Measuring cups and spoons
- Small bowl for cornstarch slurry
- Fine microplane grater for ginger
- Candy or digital thermometer (recommended for precision)
Step-by-Step Instructions
- Prepare the cornstarch slurry by whisking 1 tablespoon cornstarch with 2 tablespoons cold water in a small bowl until fully dissolved with no visible clumps. Set aside.
- In a medium heavy-bottomed saucepan, combine soy sauce, brown sugar, mirin, and rice vinegar. Whisk to begin sugar dissolution.
- Add minced garlic, grated ginger, and red pepper flakes (if using) to the saucepan.
- Place over medium heat and bring to a simmer, stirring occasionally. Cook for 2 minutes to allow the aromatics to release their flavor compounds.
- Reduce heat to medium-low and simmer for 5 minutes to begin reduction and flavor concentration.
- Re-whisk the cornstarch slurry (it will have settled) and pour it into the simmering sauce while whisking continuously to prevent lumping.
- Increase heat slightly and continue cooking, stirring frequently, until the sauce thickens noticeably and coats the back of a spoon, approximately 3-4 minutes. The ideal temperature for maximum thickening is 203°F (95°C).
- Remove from heat and stir in sesame oil. The residual heat will integrate the oil without volatilizing its essential flavor compounds.
- Allow to cool for 5 minutes before using. The glaze will continue to thicken slightly as it cools.
| Stage | Time | Temperature | Visual Indicators |
|---|---|---|---|
| Initial simmer | 2 minutes | ~200°F (93°C) | Small bubbles forming around edges |
| Reduction phase | 5 minutes | ~190°F (88°C) | Slight volume reduction, more aromatic |
| Thickening phase | 3-4 minutes | 203°F (95°C) | Visible thickening, coats spoon |
| Finishing/cooling | 5 minutes | Decreasing to ~160°F (71°C) | Smooth, glossy appearance |
Pro-Tips for Perfect Results
- For maximum flavor development, toast 1 teaspoon of sesame seeds in a dry pan until golden brown, then add to the finished glaze.
- The napé test is crucial: dip a spoon into the glaze and run your finger across the back. If it leaves a clear path that doesn’t immediately fill in, the glaze has reached optimal thickness.
- If your glaze over-thickens, incorporate water 1 teaspoon at a time while whisking over low heat until desired consistency returns.
- For a smoother texture, strain the glaze through a fine-mesh sieve before the final cooling stage to remove solid aromatics.
- Apply to chicken in 2-3 thin layers rather than one thick application, allowing 2-3 minutes between applications for proper adhesion.
- For enhanced umami depth, substitute 1 tablespoon of the soy sauce with 1 tablespoon of tamari or 1 teaspoon of high-quality fish sauce.
- The glaze performs optimally when applied during the final 5-7 minutes of high-heat cooking (425°F/218°C or higher) to achieve caramelization without burning.
Storage and Reheating
This teriyaki glaze can be stored in an airtight container in the refrigerator for up to 2 weeks. The high salt content and acidic pH (approximately 4.5-5.0) create an environment resistant to most microbial growth.
Upon refrigeration, the glaze will thicken considerably due to the gelation properties of cornstarch at lower temperatures. To return it to its optimal consistency:
- Microwave method: Heat in 10-second intervals at 50% power, stirring between each interval until the desired consistency is achieved (approximately 30-40 seconds total).
- Stovetop method: Place in a small saucepan over low heat and warm gently while stirring continuously. Add 1-2 teaspoons of water if necessary to readjust consistency.
For long-term storage, the glaze can be frozen in ice cube trays, then transferred to freezer bags for up to 3 months. This portion-control method allows for thawing only what’s needed for each application.
Related Recipes to Try
- Soy-Ginger Chicken Marinade – A complementary flavor profile that works exceptionally well with this teriyaki glaze as a finishing touch.
- Pineapple Teriyaki Chicken Breast – Incorporates this glaze with the enzymatic tenderizing properties of fresh pineapple.
- Teriyaki Glazed Chicken Skewers – Apply this glaze to threaded chicken pieces for perfect caramelization on the grill.
- Teriyaki Chicken Stir-Fry – Add this glaze during the final moments of cooking for a restaurant-quality finish.
- Teriyaki Glazed Chicken Wings – Double glaze these for maximum flavor impact and sticky-finger enjoyment.
FAQs About Teriyaki Glaze for Chicken
Why does my teriyaki glaze separate after storage?
Separation typically occurs due to excess oil content or improper emulsification. Ensure you’re adding sesame oil off-heat and limiting it to no more than 1 teaspoon per cup of glaze. When reheating, whisk vigorously to re-emulsify.
Can I make this glaze without cornstarch?
Yes. Alternative thickeners include arrowroot powder (use same amount), potato starch (use 80% of the cornstarch amount), or reduction alone (simmer 10-15 minutes longer). Each produces slightly different texture and clarity results.
My glaze isn’t thickening properly. What went wrong?
Insufficient thickening typically results from one of three issues: the cornstarch wasn’t fully dissolved before adding; the mixture didn’t reach the critical 203°F (95°C) threshold needed for gelatinization; or acid content is too high, which can interfere with cornstarch’s thickening properties.
Is this teriyaki glaze authentic?
This is a Japanese-American adaptation. Traditional Japanese teriyaki relies on a simpler 1:1:1 ratio of soy sauce, mirin, and sake, without cornstarch. Our version offers enhanced coating properties specifically optimized for Western chicken preparations.
Can I substitute honey for brown sugar?
Yes, substitute with 3 tablespoons of honey instead of 1/4 cup brown sugar. Note that honey browns more quickly during high-heat application, so monitor closely to prevent burning. The flavor profile will shift slightly, emphasizing floral notes over the molasses characteristics of brown sugar.
Conclusion
This technically optimized teriyaki glaze represents the culmination of extensive testing to solve the common challenges of adhesion, flavor balance, and caramelization. By understanding the fundamental chemical interactions—from the Maillard reactions that create complex flavors to the precise gelatinization properties of starch—we’ve created a formulation that consistently delivers restaurant-quality results.
The versatility of this glaze extends beyond simple chicken applications, functioning equally well as a finishing touch for vegetables, seafood, or even as a flavor-boosting addition to stir-fries. The carefully calibrated sweet-savory balance makes it particularly effective for introducing umami depth to leaner proteins like chicken breast that benefit from flavor enhancement. By following our precise methodology and temperature controls, you’ll achieve a glaze that transforms ordinary chicken into an extraordinary centerpiece dish.

Sticky Teriyaki Glaze for Chicken
Ingredients
- 1/2 cup low-sodium soy sauce 118ml
- 1/4 cup brown sugar, packed 50g
- 1/4 cup mirin Japanese sweet rice wine, 59ml
- 2 tablespoons rice vinegar 30ml
- 3 cloves garlic, minced approximately 9g
- 1 tablespoon fresh ginger, grated approximately 9g
- 1 tablespoon cornstarch 7.5g
- 2 tablespoons cold water for cornstarch slurry, 30ml
- 1 teaspoon sesame oil 5ml
- 1/4 teaspoon red pepper flakes optional, for heat
Method
- Prepare the cornstarch slurry by whisking 1 tablespoon cornstarch with 2 tablespoons cold water in a small bowl until fully dissolved with no visible clumps. Set aside.
- In a medium heavy-bottomed saucepan, combine soy sauce, brown sugar, mirin, and rice vinegar. Whisk to begin sugar dissolution.
- Add minced garlic, grated ginger, and red pepper flakes (if using) to the saucepan.
- Place over medium heat and bring to a simmer, stirring occasionally. Cook for 2 minutes to allow the aromatics to release their flavor compounds.
- Reduce heat to medium-low and simmer for 5 minutes to begin reduction and flavor concentration.
- Re-whisk the cornstarch slurry (it will have settled) and pour it into the simmering sauce while whisking continuously to prevent lumping.
- Increase heat slightly and continue cooking, stirring frequently, until the sauce thickens noticeably and coats the back of a spoon, approximately 3-4 minutes. The ideal temperature for maximum thickening is 203°F (95°C).
- Remove from heat and stir in sesame oil. The residual heat will integrate the oil without volatilizing its essential flavor compounds.
- Allow to cool for 5 minutes before using. The glaze will continue to thicken slightly as it cools.
Note
- Apply to chicken in 2-3 thin layers rather than one thick application, allowing 2-3 minutes between layers for proper adhesion.
- The napé test is crucial: dip a spoon into the glaze and run your finger across the back. If it leaves a clear path that doesn’t immediately fill in, the glaze has reached optimal thickness.
- For maximum flavor development, toast 1 teaspoon of sesame seeds in a dry pan until golden brown, then add to the finished glaze.
- This glaze performs optimally when applied during the final 5-7 minutes of high-heat cooking (425°F/218°C or higher).
- Store in an airtight container in the refrigerator for up to 2 weeks or freeze in ice cube trays for up to 3 months.