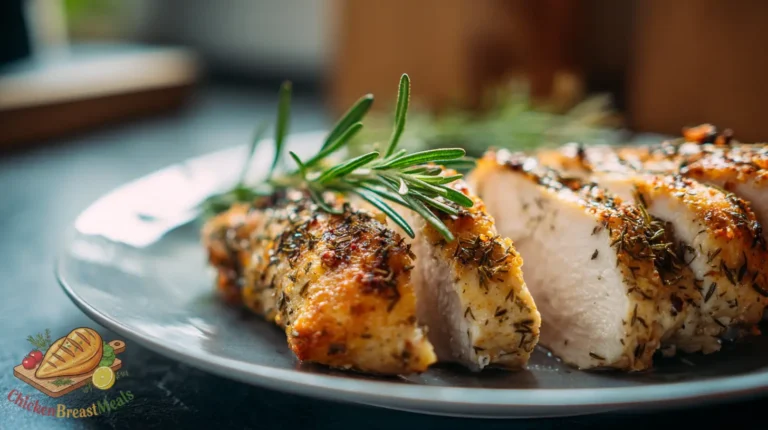
Rich & Juicy Air Fryer Garlic Butter Chicken Breast (Easy Comfort Meal)
Air fryer garlic butter chicken breast provides the perfect solution to the eternal weeknight dinner dilemma: achieving restaurant-quality flavor without extensive prep or cooking time. The challenge many home cooks face is producing chicken breasts that remain juicy inside while developing a satisfying exterior with rich flavor infusion.
Traditional methods often leave you with either dry, overcooked chicken or underdeveloped flavor profiles. The air fryer method, combined with a strategic garlic butter application, solves both problems simultaneously by creating a moisture-sealing exterior while the circulating hot air ensures even cooking throughout the meat.
Test-Kitchen Executive Summary
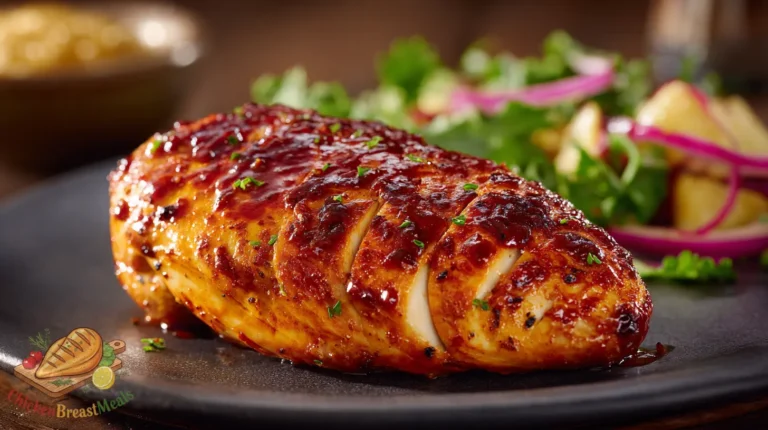
This air fryer garlic butter chicken breast recipe achieves optimal results through a technical combination of precise timing (12-15 minutes at 375°F), strategic compound butter application, and targeted resting periods. The method utilizes controlled convection principles to create a moisture retention barrier while facilitating Maillard reaction development. Temperature verification at 165°F ensures food safety while maximizing juiciness potential.
The Science of Success: Why This Recipe Works
Technical Foundations
The effectiveness of this recipe depends on understanding the interplay between several cooking principles. Air fryers function through rapid air circulation, creating a convection effect that cooks food more efficiently than conventional ovens. For chicken breasts specifically, this means we can achieve a crispy exterior while maintaining interior moisture—something particularly challenging with this lean cut.
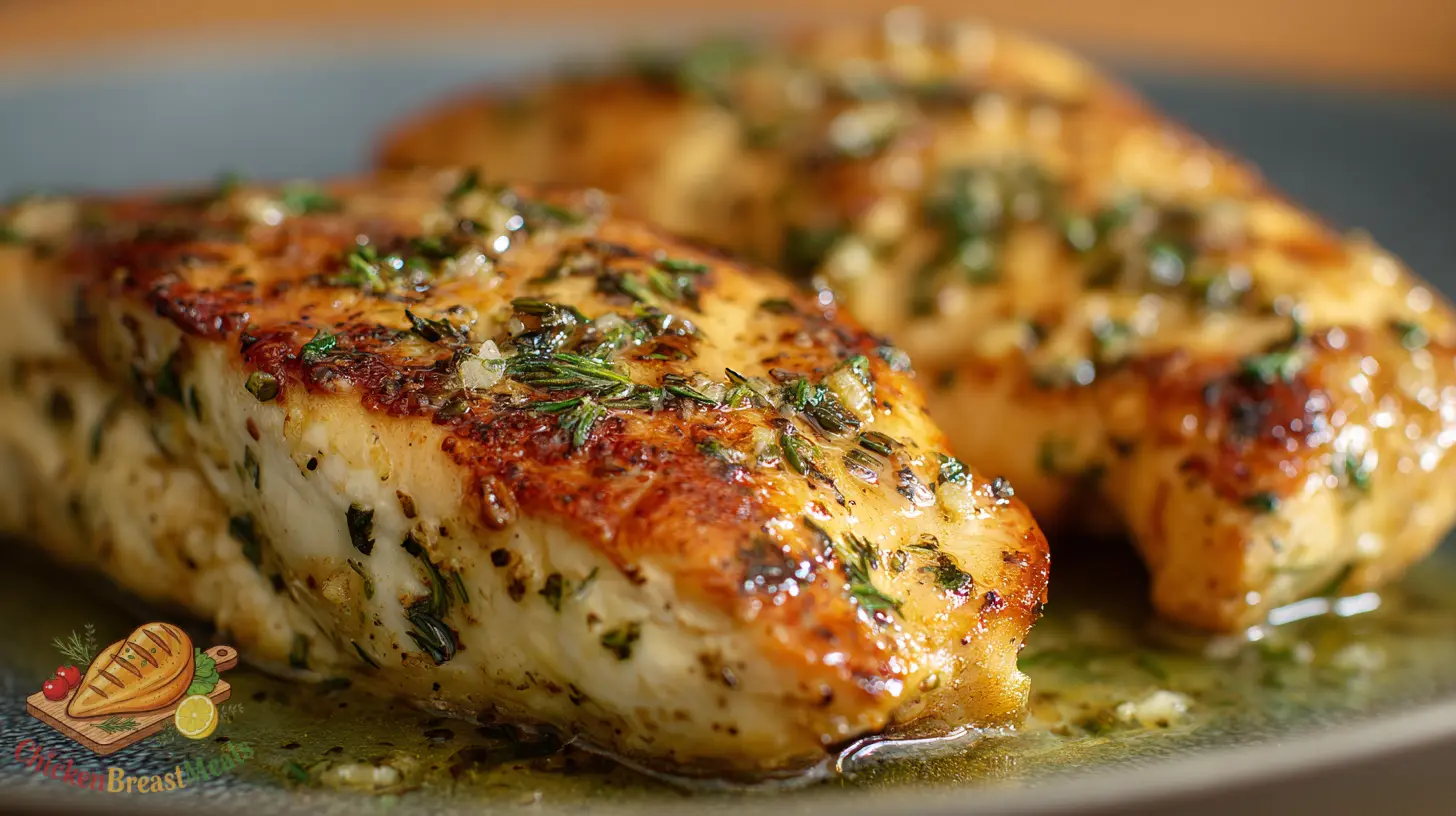
The compound garlic butter serves dual functions: first, it creates a protective fat layer that prevents moisture loss during the high-heat cooking process (similar to how we handle chicken in our master air fryer chicken breast guide); second, the butter’s milk solids and the garlic’s sugars undergo Maillard reactions, developing complex flavor compounds that infuse the meat during cooking.
Temperature precision matters significantly in this recipe. At 375°F, we hit the sweet spot where protein denaturation occurs at an ideal rate while allowing fat rendering and flavor development without excessive moisture loss. This balanced approach is why this technique consistently outperforms traditional methods.
Ingredients and Essential Tools
- Boneless, skinless chicken breasts – 8-10 oz each, ideally uniform in thickness
- Unsalted butter – 4 tablespoons, softened at room temperature
- Garlic – 4 cloves, minced or microplaned for maximum flavor distribution
- Fresh parsley – 2 tablespoons, finely chopped
- Lemon zest – 1 teaspoon (optional but recommended for brightness)
- Kosher salt – 1 teaspoon
- Black pepper – ½ teaspoon, freshly ground
- Olive oil – 2 teaspoons for light coating
Essential Equipment:
- Air fryer (minimum 4-quart capacity)
- Instant-read meat thermometer
- Mixing bowl for compound butter
- Plastic wrap (for forming compound butter log)
- Kitchen twine or toothpicks (optional, for even cooking)
Step-by-Step Instructions
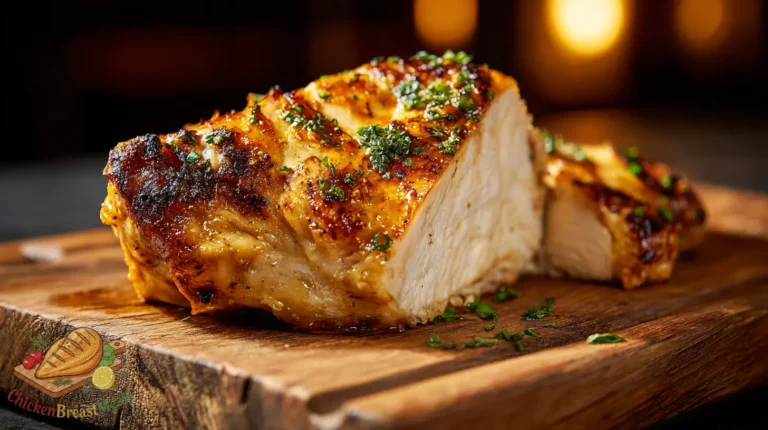
- Prepare the compound butter: In a small bowl, combine softened butter, minced garlic, parsley, lemon zest (if using), ¼ teaspoon salt, and ¼ teaspoon pepper. Mix thoroughly until evenly incorporated. Place on plastic wrap, form into a log, and refrigerate for 15 minutes to firm slightly.
- Prepare the chicken: Pat chicken breasts dry with paper towels. Check for even thickness; if portions are significantly thicker than others, place between plastic wrap and gently pound to even thickness of approximately 3/4 inch.
- Season chicken: Brush chicken breasts lightly with olive oil on all sides. Season with remaining salt and pepper, ensuring even coverage.
- Create butter pockets: Using a sharp knife, cut a horizontal pocket into the thicker side of each chicken breast, being careful not to cut all the way through. The pocket should extend to within 1/2 inch of the opposite edge.
- Insert compound butter: Remove butter from refrigerator, slice into 1/4-inch disks. Insert 1-2 disks (depending on chicken size) into each chicken pocket. Secure with toothpicks if necessary.
- Preheat air fryer: Set air fryer to 375°F and allow to preheat for 3 minutes.
- Cook chicken: Place prepared chicken breasts in the air fryer basket, ensuring they’re not touching. If cooking multiple pieces, maintain adequate space between them for proper air circulation.
- Air fry: Cook for 6 minutes, then flip chicken breasts. Continue cooking for 6-8 additional minutes, depending on thickness.
- Verify temperature: Check internal temperature using a meat thermometer inserted into the thickest part of the breast. The chicken is done when it reaches 165°F.
- Rest: Remove chicken from air fryer and let rest for 5 minutes before serving to allow juices to redistribute.
| Chicken Breast Thickness | First Side Cooking Time | Second Side Cooking Time | Total Cook Time |
|---|---|---|---|
| ¾ inch | 6 minutes | 6 minutes | 12 minutes |
| 1 inch | 6 minutes | 7 minutes | 13 minutes |
| 1¼ inch | 6 minutes | 8 minutes | 14 minutes |
| 1½ inch | 7 minutes | 9 minutes | 16 minutes |
Pro-Tips for Perfect Results
- Butter temperature matters: Butter should be soft enough to mix but cool enough to hold shape. If too warm, it will melt prematurely during cooking.
- Reserve additional butter: Keep a small portion of the compound butter separate to place on top of chicken immediately after cooking for an extra flavor boost.
- Air fryer basket arrangement: Position chicken breasts at least 1/2 inch apart to ensure proper air circulation. Crowding will result in steaming rather than air frying.
- Calibrate your air fryer: Temperature accuracy varies between models. For first-time preparation, check chicken at the 10-minute mark to establish your specific unit’s cooking profile.
- Strategic resting: The 5-minute rest period is non-negotiable. During this time, the chicken’s internal temperature will rise approximately 5°F while moisture redistributes throughout the meat.
- Garlic preparation method: Fresh garlic minced with a microplane creates more surface area for flavor release compared to knife-minced garlic.
- Compound butter variations: For flavor profiles beyond standard garlic butter, consider incorporating dried herbs like rosemary or thyme (½ teaspoon), smoked paprika (¼ teaspoon), or Dijon mustard (1 teaspoon).
Storage and Reheating
Properly stored air fryer garlic butter chicken breast maintains optimal quality when handled correctly:
Refrigeration: Store cooled chicken breasts in airtight containers for up to 3 days. Separate pieces with parchment paper to prevent sticking and flavor transfer.
Freezing: For longer storage, wrap individual chicken breasts tightly in plastic wrap, then aluminum foil, before placing in freezer bags. Remove as much air as possible. Freeze for up to 2 months. Thaw completely in refrigerator before reheating.
Reheating Methods:
- Air Fryer: Preheat to 350°F. Reheat refrigerated chicken for 3-4 minutes until internal temperature reaches 165°F. This method best preserves texture.
- Oven: Preheat to 325°F. Place chicken in an oven-safe dish, add 1-2 tablespoons of chicken broth or water, cover with foil, and heat for 10-12 minutes until warmed through.
- Microwave: Use 60% power in 30-second intervals until warmed through. While convenient, this method may compromise texture.
Related Recipes to Try
If you enjoy this air fryer garlic butter chicken breast, these complementary recipes utilize similar techniques or flavor profiles:
- Oven-Baked Lemon Chicken Breast with Garlic and Herbs – Perfect when you need to prepare larger quantities than your air fryer can accommodate.
- Air Fryer Bone-In Chicken Breast – Applies similar principles but accounts for the different cooking dynamics of bone-in cuts.
- Air Fryer Chicken Thighs with Garlic Butter – A higher-fat content variation that creates an even more luxurious flavor profile.
- Garlic Butter Sous Vide Chicken Breast – For the ultimate precision in temperature control and moisture retention.
- Garlic Butter Chicken Stir Fry – A quick-cooking variation that incorporates vegetables for a complete meal.
FAQs About Air Fryer Garlic Butter Chicken Breast
Can I use frozen chicken breasts for this recipe?
While fresh chicken yields optimal results, you can use frozen chicken breasts with modifications. Thaw completely before creating the butter pocket. Alternatively, air fry frozen breasts at 360°F for 5 minutes, then proceed with creating pockets and adding butter before completing the cooking process at 375°F.
Why did my garlic burn during cooking?
Garlic burning typically occurs when the butter pocket is too close to the chicken’s surface or when cooking at temperatures exceeding 375°F. Ensure butter is deeply inserted into the pocket and verify your air fryer’s temperature accuracy with an oven thermometer.
Can I substitute dried garlic for fresh in the compound butter?
Yes, though flavor intensity differs. Replace 4 fresh garlic cloves with 1 teaspoon garlic powder, incorporating it thoroughly into the butter. Rehydrate the garlic powder with 1/2 teaspoon lemon juice or white wine for improved flavor distribution.
My chicken appears done but hasn’t reached 165°F internally. What should I do?
Continue cooking in 1-minute increments until reaching the safe internal temperature of 165°F. If the exterior is browning too quickly, reduce temperature to 360°F for the remaining cook time to prevent drying while reaching food safety standards.
How can I prevent the butter from completely melting out during cooking?
Ensure butter is properly chilled before insertion, seal the chicken pocket opening by pressing edges together, and consider securing with toothpicks. Additionally, make the pocket deep but with a small opening to create a seal during cooking.
Can I make the compound butter in advance?
Absolutely. Compound butter can be prepared up to one week in advance when refrigerated or up to 3 months when frozen. Shape into a log using plastic wrap for easy slicing when needed.
Conclusion
Air fryer garlic butter chicken breast represents the intersection of culinary science, technical precision, and flavor optimization. The controlled high-heat environment of the air fryer, combined with the strategic application of compound butter, creates a synergistic cooking method that consistently produces superior results compared to conventional techniques.
The key to this recipe’s success lies in understanding the functional purposes behind each step: from the precise temperature selection that balances protein denaturation with moisture retention, to the compound butter that serves as both flavor vehicle and protection mechanism against drying.
What makes this approach particularly valuable is its adaptability to various kitchen skill levels and time constraints. The basic technique can be mastered quickly, while the compound butter component offers endless customization potential for those seeking to expand their flavor repertoire.
For optimal results, focus on temperature verification rather than strict timing guidelines, as individual air fryer models and chicken breast sizes will create natural variations in cooking duration. This technical approach to a seemingly simple dish demonstrates how understanding foundational cooking principles can elevate everyday ingredients to exceptional culinary experiences.
Air Fryer Garlic Butter Chicken Breast
Ingredients
- 2 boneless skinless chicken breasts (8-10oz each) uniform thickness preferred
- 4 tablespoons unsalted butter softened at room temperature
- 4 cloves garlic minced or microplaned
- 2 tablespoons fresh parsley finely chopped
- 1 teaspoon lemon zest optional
- 1 teaspoon kosher salt divided
- 1/2 teaspoon black pepper freshly ground, divided
- 2 teaspoons olive oil for coating chicken
Method
- In a small bowl, combine softened butter, minced garlic, parsley, lemon zest (if using), ¼ teaspoon salt, and ¼ teaspoon pepper. Mix thoroughly until evenly incorporated. Place on plastic wrap, form into a log, and refrigerate for 15 minutes to firm slightly.
- Pat chicken breasts dry with paper towels. Check for even thickness; if portions are significantly thicker than others, place between plastic wrap and gently pound to even thickness of approximately 3/4 inch.
- Brush chicken breasts lightly with olive oil on all sides. Season with remaining salt and pepper, ensuring even coverage.
- Using a sharp knife, cut a horizontal pocket into the thicker side of each chicken breast, being careful not to cut all the way through. The pocket should extend to within 1/2 inch of the opposite edge.
- Remove butter from refrigerator, slice into 1/4-inch disks. Insert 1-2 disks (depending on chicken size) into each chicken pocket. Secure with toothpicks if necessary.
- Set air fryer to 375°F and allow to preheat for 3 minutes.
- Place prepared chicken breasts in the air fryer basket, ensuring they’re not touching. If cooking multiple pieces, maintain adequate space between them for proper air circulation.
- Cook for 6 minutes, then flip chicken breasts. Continue cooking for 6-8 additional minutes, depending on thickness.
- Check internal temperature using a meat thermometer inserted into the thickest part of the breast. The chicken is done when it reaches 165°F.
- Remove chicken from air fryer and let rest for 5 minutes before serving to allow juices to redistribute.
Note
- For best results, ensure butter is well-chilled before inserting into chicken pockets
- Check chicken temperature at the thickest part to ensure food safety
- The 5-minute rest is crucial for maintaining juiciness
- Cooking times may vary based on your specific air fryer model
- Reserve a small portion of compound butter to place on top of chicken immediately after cooking for extra flavor